:li:/t is a modern Microsoft 365 “link indirection” prefix used for List Item–based sharing links, where the link does not directly expose a file or site path, but instead points to an internal resource ID that SharePoint resolves at runtime.
with :li:/t links, the “managed path” (/teams/ vs /sites/) can be completely absent from the URL, even when the underlying site is clearly under /teams/....
Why Shared Links Don’t Show /sites or /teams — and How to Get the Real Site URL? Covers why modern Microsoft 365 sharing links omit managed paths and how to use Microsoft Graph to identify the actual SharePoint site associated with a shared item.
Initially, *.Selected permissions scope in Graph API only restricted app access to a site collection. Now, it also supports lists, items, folders, and files, and all ‘Selected’ scopes work in both delegated and application modes. This means more granular SharePoint content access for custom apps using the Graph API. Below, I’ll deep-dive into SelectedOperations.Selected permissions and include Python and PowerShell samples for using them.
Client Application
There must be an App Registration for client application that would have access to a SharePoint list.
At this moment (we have a client app and secret, and “” API permissions, but did not provide for this app access to specific sites or libraries) – we should be able to authenticate to Microsoft 365, but not able to get any kind of data (we can get token, but other call to Graph API would return 403 error – Error: b'{“error”:{“code”:”accessDenied”,”message”:”Request Doesn\’t have the required Permission scopes to access a site.”,):
This app registration should have Microsoft Graph “Lists.SelectedOperations.Selected” (or “ListItems.SelectedOperations.Selected” or “Files.SelectedOperations.Selected”) API permissions consented. Registered app Microsoft Graph API permissions should look like:
I use Python console app as a client application. Link to the code at the GitHub is shared below under References, but the core part of the Python code is (I do not use any Microsoft or other libraries here, just plain requests to Microsoft Graph for authentication and for data):
import requests
import json
from secrets import clientSc, clientId, tenantId, siteId, listId

# specify client id, client secret and tenant id
# clientId = ""
# clientSc = ""
# tenantId = ""

apiUri = "https://login.microsoftonline.com/" + tenantId + "/oauth2/v2.0/token"

body = {
    "client_id"     : clientId,
    "client_secret" : clientSc,
    "scope"         : "https://graph.microsoft.com/.default",
    "grant_type"    : "client_credentials"
}

try:
    response = requests.post(apiUri, data=body)
    token = json.loads(response.content)["access_token"]
except:
    print("Error: ", json.loads(response.content)["error_description"])
    exit()

print("Got token: ", token[0:10], "...")
headers={'Authorization': 'Bearer {0}'.format(token)}

# Get specific site list
print("Geting specific site list")
# graph_url = 'https://graph.microsoft.com/v1.0/sites/' + siteId + '/lists/' + listId
graph_url = 'https://graph.microsoft.com/beta/sites/' + siteId + '/lists/' + listId
graphResponse = requests.get(   graph_url, headers=headers )
print(" Response status code: ", graphResponse.status_code)
if graphResponse.status_code == 200:
    list = json.loads(graphResponse.content)
    print(" List display name: ", list["displayName"])
In this article I’ll guide you through how to get PowerShell and configure your environment for PowerShell scripting against Microsoft 365. For those who do not need detailed instructions:
Install PowerShell 7 (cross-platform one)
Install Visual Studio Code
find and install PowerShell plugin for VSCode
install MgGraph (Microsoft Graph) module
install PnP.PowerShell module
Get and configure Azure App Registration
registration a new Azure App
configure API permissions and get admin consent
configure authentication
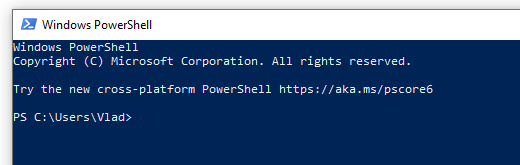
Windows PowerShell
Every Windows computer comes with PowerShell pre-installed. So if you are on a Windows machine – try the following: Start -> Windows PowerShell. You’ll see:
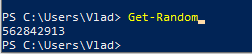
So you can type something like “Get-Date” or “Get-ComputerInfo” or “Get-Disk” or “Get-Random” and see results right away, e.g.:
But, hold on! This is not the PowerShell we need. This is so-called PowerShell 5 (classic, legacy one, nowadays called “Windows PowerShell”). Though you can use Windows PowerShell OotB, we will use new, modern, cross-platform PowerShell (for Windows, Linux, and macOS).
PowerShell
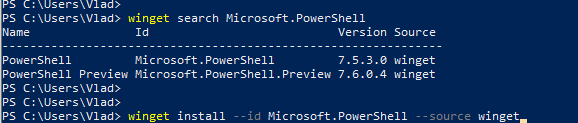
This is how nowadays called a new cross-platform PowerShell. Just “PowerShell” (or PowerShell 7, as 7 is it’s current/latest major version. Here is the Microsoft’s official guide “Install PowerShell on Windows, Linux, and macOS“. There are multiple options to install PowerShell 7 – just choose your one (you are Power User, you should figure it out). E.g. you can use your Windows PowerShell window to install PowerShell 7:
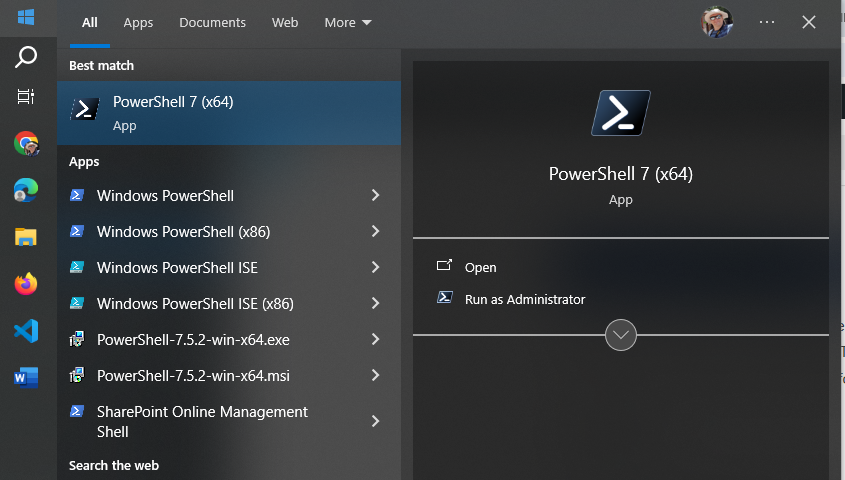
Once modern PowerShell, your Start->PowerShell experience should look like:
Notice that you have both – PowerShell 5 (for Windows) and PowerShell 7 (cross-platform).
Start PowerShell 7 and try something like “Get-Command” or “Get-Help”. Congratulations! Let go to the next step.
IDE – Integrated Development Environment
So far what you did – you used PowerShell cmdlets in command-line window. It is ok to use plain PowerShell window to quickly run one or a few PowerShell commands, but usually we work with scripts. A PowerShell script is a program written in PowerShell – composed of a sequence of PowerShell cmdlets, structured with logic to perform specific tasks. So we would need some kind of editor for PowerShell programs. Actually you can use any universal text editor – like Notepad, Notepad++ to create your code, you’d save it as .ps1 file (e.g. myFirstScript.ps1) and than run you script with PowerShell. But there is a better way – using IDE. IDE stands for “Integrated Development Environment” – a developer-oriented text editor equipped with a bunch of goodies that help creating and debugging code.
Visual Studio Code
One of the most popular IDE is Visual Studio Code (or vscode) – a free open-source IDE from Microsoft. You can get it from code.visualstudio.com – just download it and install it.
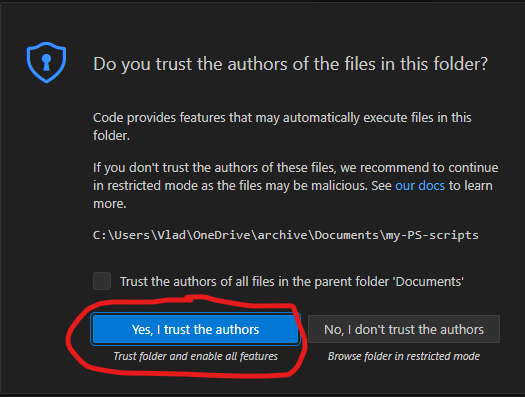
I’d recommend you to take some brief vscode introduction lessons – like this one from Microsoft. VScode can be used to code in many programming languages – Python, C#, Javascript etc. We will be using it to code in PowerShell. I’d recommend to create a new folder for your PowerShell scripts, and from VSCode open a folder. After you trust yourself – you’ll see something like:
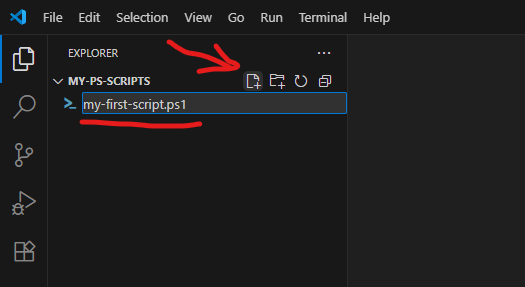
Using “New file” icon – create a new file, name it e.g. “my-first-script.ps1” (.ps1 extension is required).
PowerShell plugin
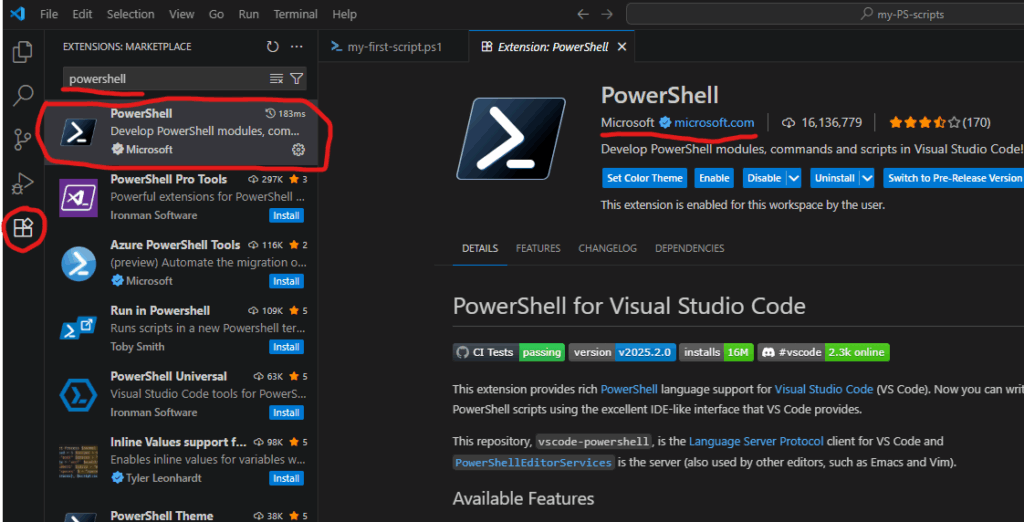
VSCode will realize that you are coding in PowerShell and suggest you to install a PowerShell plugin (or you can install it manually):
PowerShell plugin is the last piece we need to start scripting in PowerShell.
PowerShell Modules
Technically, what we already installed – enough to start coding for SharePoint (e.g. calling Microsoft Graph API via built-in Invoke-RestMethod), but there are some much more convenient ways – using modules.
PowerShell is built around modules. Every command you use is provided by a module. PowerShell includes built-in modules out of the box that offer essential cmdlets (such as Get-Host). However, to work with Microsoft 365 services, you’ll need additional modules that contain cmdlets specifically designed for interacting with Microsoft 365. There are modules to work with Teams, Exchange, SharePoint, Entra Id etc. Below are the most popular modules.
Microsoft Graph
Microsoft Graph is a unified API endpoint developed by Microsoft that allows developers and IT professionals to access and interact with a wide range of Microsoft 365 services and data. It acts as a gateway to data stored across Microsoft services. Utilizing Microsoft Graph from PowerShell code is better done with Microsoft Graph PowerShell SDK. So check it out and install.
PnP.PowerShell
The other very popular and useful module is PnP.PowerShell. PnP is an open source community backed by Microsoft (but PnP products are not officially supported by Microsoft). The PnP team does an excellent job of developing and providing a wide range of tools, SDKs, documentation, learning videos, and other resources to help developers work with Microsoft 365 efficiently. For PowerShell developers they maintain PnP.PowerShell module. So please go ahead and install it as well.
Authentication and Authorization
To work with Microsoft 365, the first step is authentication – essentially proving that you are actually who you claim to be (via providing login name and password or fingerprint etc.). Once you authenticated to Microsoft – you can access resources if you have permissions and cannot access others because you do not have permissions provided. This is called authorization.
This is true for your interactive experience with Microsoft 365 via browser, or Teams app etc. The same is true when you access Microsoft 365 programmatically – via PowerShell code. You need to authenticate and being authorized.
For smooth authentication and authorization to Microsoft 365 from your PowerShell code you’d need so called App Registration properly configured. App Registration is where API permissions and authentication methods are specified.
There are two authentication methods most commonly used in programming – interactive and non-interactive. Interactive authentication – is when a program acts on behalf of a user (e.g. you as a current user). The other method is used when your program needs to work unattended (without user presence) – on behalf of an application itself with it’s own permissions. You’d need separate app registration for each of these methods.
Interactive Applications
Interactive programs is what we will mostly use in this “PowerShell for Power Users” series of tutorials. Interactive login require delegated API permissions configured in the App Registration and proper authentication configuration Authentication blade. When your interactive program works – it’s effective permissions are the intersection of your personal permissions and permissions specified in the app registration.
Non-Interactive programs (also called daemon apps or background services or scheduled jobs etc.) are used mostly used by admins for tenant-level automation. But it is possible to automate something for a specific site, e.g. one of the common scenarios – data analytics can automate pulling some data from SharePoint site into e.g. Azure Data factory via pipeline. Non-Interactive authentication require application API permissions configured in the App registration and a secret generated or certificate uploaded. When a non-interactive program works – it’s effective permissions are the permissions specified in the app registration.
Microsoft says “Initially, Sites.Selected existed to restrict an application’s access to a single site collection. Now, lists, list items, folders, and files are also supported, and all Selected scopes now support delegated and application modes.”. In other words, Microsoft started supporting even more granular access to SharePoint content from custom applications using Microsoft Graph API.
In the article below I will deep-dive into SelectedOperations.Selected permissions, including PowerShell scripts to provide granular permissions (if you want to know more about Sites.Selected Graph API permissions – it’s here).
Why do we need SelectedOperations.Selected Graph API permissions
Granular permissions available are:
Lists.SelectedOperations.Selected
Provides application access to a specific list
ListItems.SelectedOperations.Selected
Provides application access to one or more list items, files, or folders
Files.SelectedOperations.Selected
Provides application access to to one or more files or library folders
Set of SelectedOperations permissions is exactly what Microsoft promised a few years ago. And this is great, as we really need granular access to the content in SharePoint sites. I’ve been supporting enterprise SharePoint for more than 15 years now, and I know that it was always a concern if application in fact requires access to a specific list/library or a folder or even one file, but admins provide access to entire site collection.
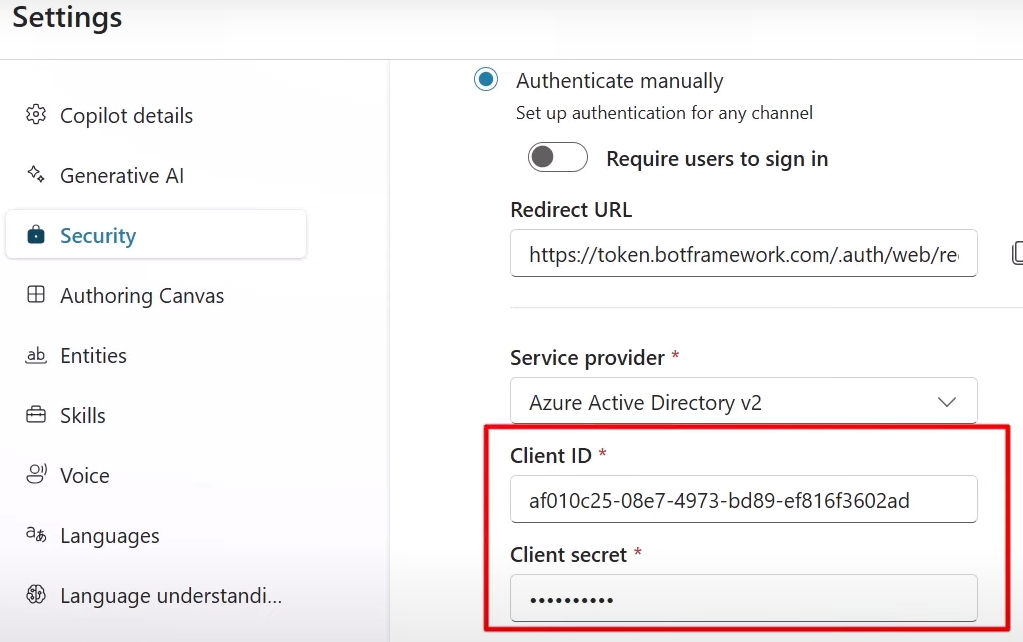
Especially, I believe, this feature will become more in demand due to Copilot for Microsoft 365. Currently – it’s mostly developers and data analytics who needs unattended application access to SharePoint, but sooner or later regular users powered with m365 Copilot license will start creating autonomous agents…
Here is the screenshot of a Copilot agent authentication/access to SharePoint data using client id and secret:
So below is my research and lab setup, guide with screenshots and PowerShell scripts on how to provide granular (to library/list or folder, or even just one document or list item) Graph API permissions to SharePoint. This KBA is for Microsoft 365 SharePoint administrators. I’m planning to have a separate KBA for developers on how to use granular permissions.
Prerequisites
Admin App
First, we need an Admin App – an app we will be using to provide permissions.
The only requirement to the app is: the app should have Microsoft.Graph Sites.FullControl.All Graph API permissions consented:
Target Site, List. Item
Your client will probably provide you with the link to the SharePoint resource they need access to. But to do both – to provide granular permissions – or to access one specific list, folder or item – we need to know this site id, list id, item id. So it’ll be our admins job to decompose the link and get Ids to provide access, then share these Ids with the client with some instructions on how to call Graph API to get access.
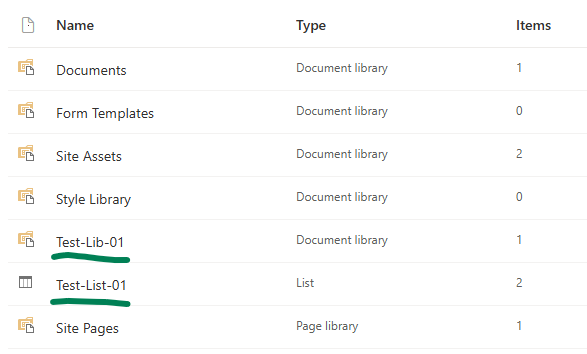
For this lab/demo setup, I have created three sites under Microsoft Teams (group-based Teams-connected SharePoint sites), then test list and test library in each, like this:
Client Application
There must be an App Registration for client application – application that will have access to Test-List-01 and Test-Lib-01 only. This app registration should have Microsoft Graph “Lists.SelectedOperations.Selected” or “ListItems.SelectedOperations.Selected” or “Files.SelectedOperations.Selected” API permissions consented. Example below has Lists:
Providing selectedoperations permissions
PowerShell script to provide selectedoperations.selected access for an app to a specific list would be as below. Here we use plain calls to MS Graph API. Full script for your refence is available at GitHub, but here is the essential part:
(Update from 2025-10-28) SelectedOperations permissions are still in beta. E.g. I have to call “https://graph.microsoft.com/beta/sites/$targetSiteId/lists/$targetSiteListId/permissions” When trying to call “/v1.0/sites/$targetSiteId/lists/$targetSiteListId/permissions” it says "code": "BadRequest", "message": "Resource not found for the segment \u0027permissions\u0027."
The “/beta/sites/$targetSiteId/lists/$targetSiteListId/permissions” API returns not only applications permissions, but also user’s permissions!
TBD: I’m not sure if it’s a bug or my incorrect setup, but I noticed that if I provide access for the app to the list – app can read site.
Python code samples published by Microsoft at the Microsoft Graph API reference pages use GraphServiceClient module. But you also can use just requests module and call Microsoft graph API directly, using requests.post or requests.get methods. Here I’m sharing my Python code samples.
In 2021 Microsoft implemented “Sites.Selected” Graph API permissions to allow application access (without a signed in user) to specific sites (entire site only). In 2024 Microsoft implemented granular access – to specific list/libraries, as well as to specific documents/files and list items. Now name convention is *.SelectedOperations.Selected. Permissions come in two flavors – delegated and application:
Files.SelectedOperations.Selected – Allow the application to access a subset of files (files explicitly permissioned to the application). The specific files and the permissions granted will be configured in SharePoint Online or OneDrive.
ListItems.SelectedOperations.Selected – Allow the application to access a subset of lists. The specific lists and the permissions granted will be configured in SharePoint Online.
Lists.SelectedOperations.Selected – Allow the application to access a subset of lists. The specific lists and the permissions granted will be configured in SharePoint Online.
secrets is a Python file where I assign client secret to variable clientSc (so my secret is not shared on github). This is ok for demo purposes but generally, you should not hard-code secrets but keep secrets somewhere safe (Vault).
There is a Microsoft.Graph PowerShell module provided by Microsoft which simplifies usage of Microsoft Graph API. Below is how to authenticate to MS Graph and how to search within SharePoint and Teams Microsoft 365 content using Microsoft.Graph PowerShell module.
For daemon app authentication we need a certificate configured in Azure App and installed on the user machine. Daemon app authentication code sample (please specify your tenant id, app (client) id and certificate thumbprint:
Microsoft Graph API allows you to work with all the Microsoft 365 content – including search through Exchange e-mail messages, Yammer (Viva Engage) and Teams chat messages and surely OneDrive and SharePoint content (please refer to the original doc). Let me focus on searching in SharePoint Online and OD here but you can use the same technique to search through other Microsoft 365 services. I will use PowerShell but same ideas should work for other platforms/languages – Python, C#, node.js etc.
Assuming we have a registered Azure app configured correctly, including Secrets/Certificates blade and API permissions provided – we should be ready to authenticate and call Graph API unattended – on behalf of application itself.
Let us authenticate as a service/daemon app with client id and client secret:
# Authenticate to M365 as an unattended application

# specify your app id. app secret, tenant id:
$clientID = ""
$clientSc = ""
$TenantId = ""

# Construct URI and body needed for authentication
$uri = "https://login.microsoftonline.com/$tenantId/oauth2/v2.0/token"
$body = @{
    client_id     = $clientID
    client_secret = $clientSc
    scope         = "https://graph.microsoft.com/.default"
    grant_type    = "client_credentials"
}

# Get OAuth 2.0 Token
$tokenRequest = Invoke-WebRequest -Method Post -Uri $uri -ContentType "application/x-www-form-urlencoded" -Body $body -UseBasicParsing
$token = ($tokenRequest.Content | ConvertFrom-Json).access_token
$headers = @{Authorization = "Bearer $token" }
Below is how I search Microsoft 365 content programmatically from PowerShell using MS Graph API being authenticates as user.
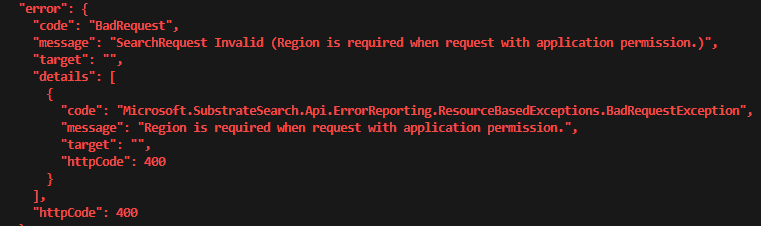
Notice we use “region” – it is required to search with Graph API under application credentials. Otherwise you will get an error message “SearchRequest Invalid (Region is required when request with application permission.)”:
Parameter “fields” allows you to request only fields you need to be returned. As returning object will be smaller your request will perform faster.
There might be a big number of objects found in m365 upon your request. Graph will not always return to you all the results. AFAIK currently the limit is 500, so if there are more than 500 objects found – only first 500 will be returned. You can specify how many objects you need to be returned per call with “size” parameter.
You can check value of $res.value[0].hitsContainers[0].moreResultsAvailable property and if it’s True – that means there are more results. The value above and parameters “from” and “size” would allow you to organize a loop so you can call search API many times to return all results.
Search in Viva Engage (Yammer)
Search in Yammer (Viva Engage) is special. In Viva Engage there are files and there are posts (messages).
So to search through files (pictures, documents) shared via Viva Engage – you can use Graph API SharePoint search, as all Viva Engage files (documents, pictures etc.) are stored in SharePoint site every community got at creation.
To search through Yammer messages (Viva Engage posts, questions, answers, discussions etc.) you have to use classic Yammer API (see details on Yammer API usage), because currently (Mar 2025) Microsoft Graph API does not support search in Viva Engage (Yammer) messages, even with beta.