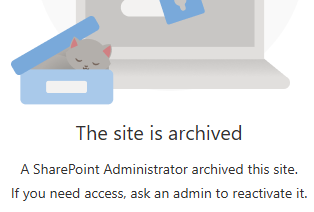
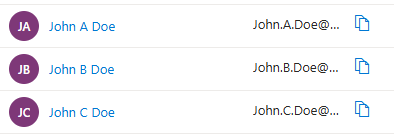
There is a known problem in Microsoft 365 SharePoint called “User ID Mismatch”. It happens if a user account is deleted from the Entra Id directory, and then a new account is created with the same UPN (e.g. rehired person or a person with a popular name like John Smith). Symptoms are: a user is provided with the access to the resource, but still cannot open it and gets “Access denied” error or “Sorry, something went wrong” and “There is a legacy user account in this site with same email. Please ask site owner or administrator to remove the legacy user account from this site”.
The reason behind it is that SharePoint stores users data in it’s own database (accessible via hidden system list called User Information List – UIL). Properties include display name, title, UPN, and (!) AD SID and Entra Id user object id. So when a re-used UPN tries to access the SharePoint site – Microsoft 365 compares Ids and declines access. So access needs to be re-provided. And this is where the actual issue appears.
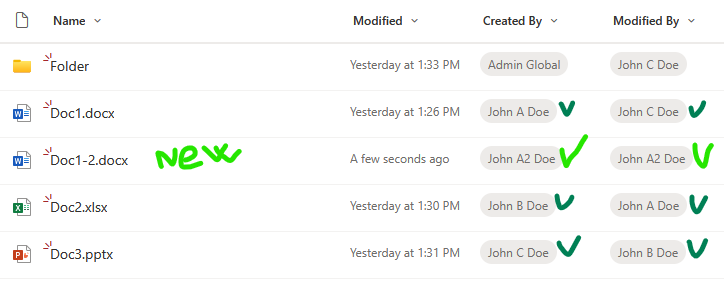
If the site was accessed by the “old” user in the past, site UIL contains information about that “old” user. When the site owner shares the site with the “new” user – Microsoft does dot update the UIL with the new user ids. Microsoft 365 behave “normally”, no error messages are displayed. So for the user and for the site owner it looks like access was provided, but in fact it’s not.
Existing fix
Microsoft knows about the issue. But instead of fixing the root cause – Microsoft recommends removing the old user from the UIL. Obviously this fix is a) reactive, b) for one specific user and c) for one specific site. In my previous article – Fixing SharePoint User ID Mismatch Issue – I explained the issue in details, outlined 3 options to fix the issue, including PowerShell script.
But the User ID Mismatch issue does not come for a one site and one user. Usually it impacts many sites, and the older your tenant is – the more reused UPNs you get. The bigger the tenant – the bigger the problem.
Moreover, the issue is tricky to recognize. From the user perspective it looks like “normal” permissions issue – so it takes some time for user and site admin to realize that something is wrong and reach support. So can we do it proactively? I mean, can we not only fix the issue for all impacted sites after the user hit the issue, but prevent the issue to appear?
Let us try to go deeper into the issue and find some more consistent solutions.
Fix the issue “everywhere” at once thoughts
Define terms
- Reactive – once we got a “user id mismatch” ticket – we can fix the issue for a site we got ticket for, and then try to find all sites with the user id mismatch issue for the same user
- Proactive – we’d fix the issue before the user hit Access Denied error due to User Id Mismatch issue. For this we need somehow
Fix all sites for one specific user reactively
Again, the issue is scoped with a specific site (site collection). The mentioned PowerShell-based solution and all Microsoft’s fixes are designed for one specific site, but in real life what is happening is the “old id user” had access to many sites, and “new id user” has access to many sites, so after a several “access denied” issues a user might be confused and ask SharePoint admins to fix the issue “everywhere”. We should not bother users with “please provide us list of site Url you are having issues with”… or saying to user “please create a new ticket when you hit the same issue again” also does not sound nice.
So how do we fix the User Id Mismatch Issue on all sites for a specific user (reactively)?
At first, the solution looks simple: we need to check all sites old user had access to and remove UPN from UIL. Well… yes… But how do we get a list of sites the old user present in the UIL?
So far – I’m not seeing a good solution.
Option 1: Brute force – scan all sites.
- Get list of all tenant sites
- For every site – check if the user is in the UIL
- If yes – check if this is a User Id Mismatch case
- If yes – remove the user from UIL
This option is comprehensive, i.e. it should fix the issue for all sites, so in case of reused UPN we should not have issues for any tenant site for the same user. But this is a really “heavy” solution and can work well for small tenants only. I do not think this option is feasible for medium or large tenants.
Option 2: Access report.
There are 3-rd party tools (I’m not aware if there is a built-in m365 tool for that) you can use to get report on all SharePoint resources user have access in tenant. So you’d export the list, select unique sites Urls and scan these sites. Possible issues – usually we no not know how the 3-rd party tool builds this report (if the UPN or object Id is used), would it be “old” user access report or “new” user access report?
Option 3: membership
We can use MS Graph “membership” and “people” API to get list of sites around. We can get our user membership – m365 groups and related sites. People API would return users related to our client – a collection of person objects based on their relevance to the user, which is determined by the user’s communication and collaboration patterns, and business relationships. We can get these people OD sites, we can get their groups memberships and sites. We can do the same for people related to people. NB: I know, this option would give us sites related to a new user, not old user.
Add-on to Option 3: common sites.
With Option 3 we’d get group-based and OD sites. How about standalone sites? Also there might be public teams…
Usually in any tenant number of group-based sites (teams sites) are much bigger than non-group-based sites. So we can simply scan all standalone sites. But, again, in large tenants this might not be a feasible option. But we can get list of “open” standalone sites and public teams and Yammer communities (i.e. “common sites” usually accessed by everyone in tenant). Additionally, over the time we can get “most popular impacted sites” form the fixing history to update our list of common sites.
Option 5: audit log
Reactively, we can use audit log to get AccessDenied sites for a new user
- Get audit log and filter it by user and select only “AccessDenied” pages
- Make a unique list of accessed sites
- For every site – check if this is a User Id Mismatch case
- If yes – remove the user id from site’s UIL
What I do not like here is getting audit log is a slow operation, and still re-active. I use it when I cannot reach impacted user and I need to know list of sites user already having issues with.
Practice
My personal experience.
Option 1. In my simple tests – it takes ~1 hour to scan ~500 sites (keep in mind, we need to scan all sites, including personals/OneDrive).
Options 2 and 3 helps, as allows to cover majority of impacted sites our re-used UPN user might have issues with. But we cannot guarantee we fixed all sites for the specific user.
Fix all sites for all users proactively
Obviously, for proactive solution, we need to start from Identity Management. Below are just thoughts so far…
No re-used UPNs.
Providing a unique UPN each time we create a user might help.
Know re-used UPN.
If we knew every reused UPN at the moment of account creation (an employee onboarding) – we could proactively apply Options 1,2,3 from our reactive approach.
Total clean-up
In theory – we could use our reactive Options 1, 2, 3 and 5 at the moment of the employee off-boarding to find all sites user had access to and just remove the terminated employee’s account from all sites UIL.
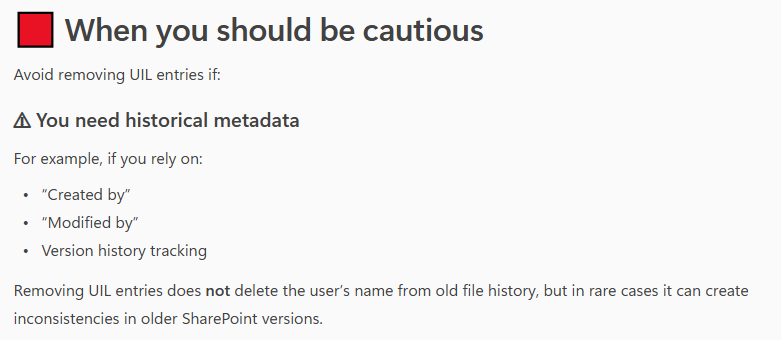
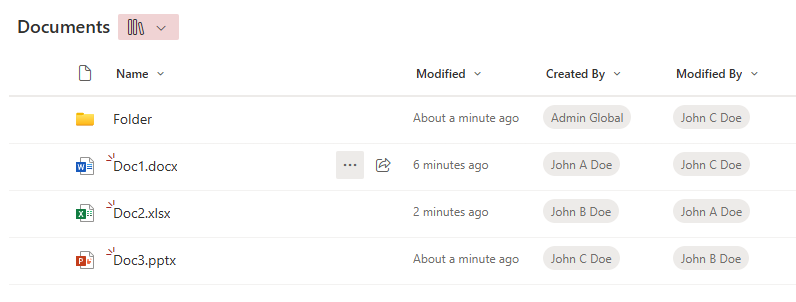
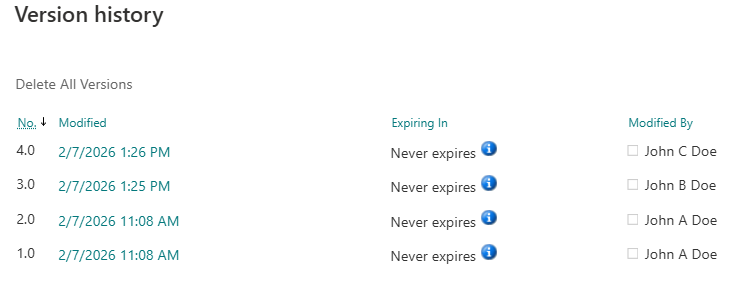
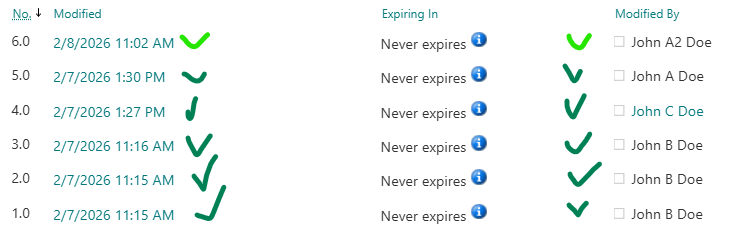
That would prevent user mismatch Id in the future. Removing a user from UIL should not impact edit history – i.e. user’s Name will still be populated correctly if you want to check versions history of documents created or updated by this user. Scanning all sites for every off-boarded employee could be an option for small tenants.
3-rd party tools
There are 3-rd party tools (e.g. SysKit Point).
SysKit’s Orphaned users governance policy currently is very simple, but new updates – i.e. Dec 16, 2025 – as advertised would allow to reove orphaned users automatically from sites. Once I got this update installed – I’ll test it and share here, as if all good – this might be the only real solution to a user id mismatch issue.
Bottom Line
Currently, there is no effective, tenant-wide, proactive solution that guarantees protection from user id mismatch issue. The bottleneck here is inability to quickly get list of sites a user had access to.
Custom PowerShell scripts would work only in small environment, but the “total scan” approach would hardly be realistic in large environments.
There are though 3-rd party tools that build it’s own database with all the permissions of all users, which could be the foundation for the “Prevent user id Mismatch” functionality.