Category Archives: SharePoint

SPO: Description, Owner fields are not searchable

Update (Apr 2024): It seems like Microsoft changed this behavior for Microsoft 365, so consider this article as an obsolete. Though it is possible that content is still relevant for on-prem versions of SharePoint server.

Scenario:

You have a list (or a document library) in SharePoint Online.
You can search through the list but some fields (or document properties) like “Description”, “Subject”, “Author”, “Owner”, “AssignedTo”, “Created”, “CreatedBy” are not searchable.

Cause:

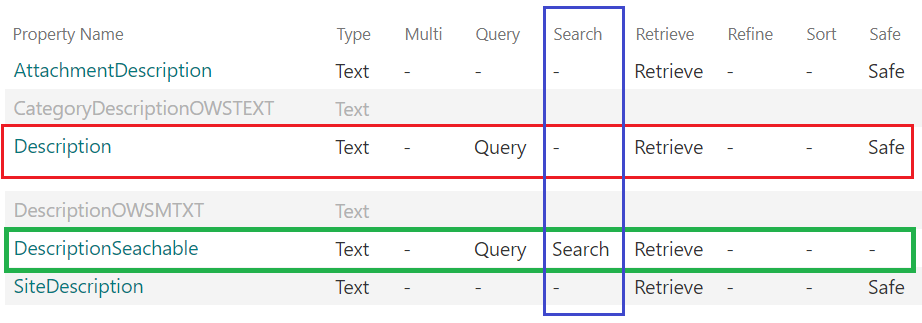
Crawled properties are mapped to non-searchable managed properties. So this is by design. Check Microsoft’s “Overview of crawled and managed properties in SharePoint Server” (we do not have this document for SharePoint Online, so we have to rely on this doc; though you can go to your Search schema in SPO to verify). You see some pre-created managed properties do not have “Searchable” option enabled.

Solution:

(See below for details, as this is still not finished:)

Prove:

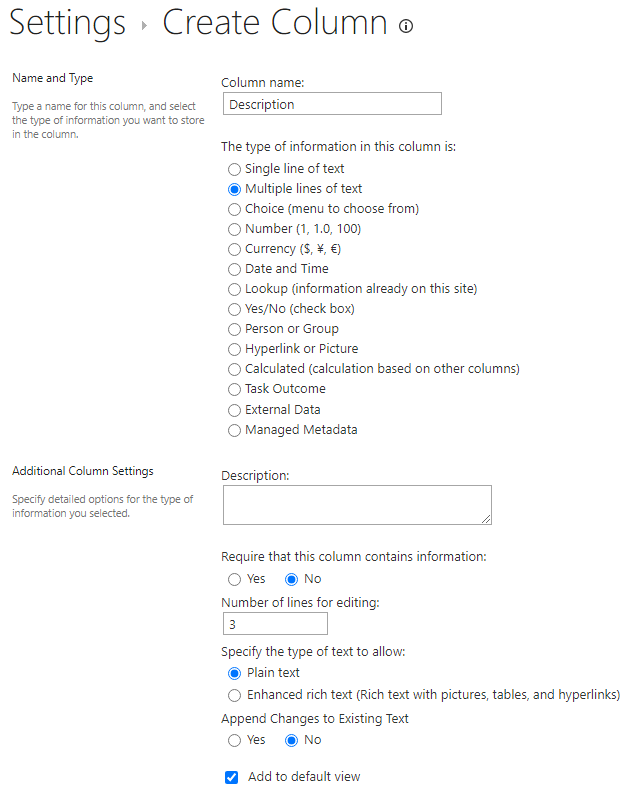
I have created a new SPO site test78, a new list Test11 and created (not added from existing) a custom field “Description” to the list:

I also created “Description2” column the same way. No data is added to the list so far.

Search schema looks like:

for Description managed property:

mapping:

Notice that “Description” managed property is not searchable and “ows_Description” crawled property is mapped to “Description” managed property.

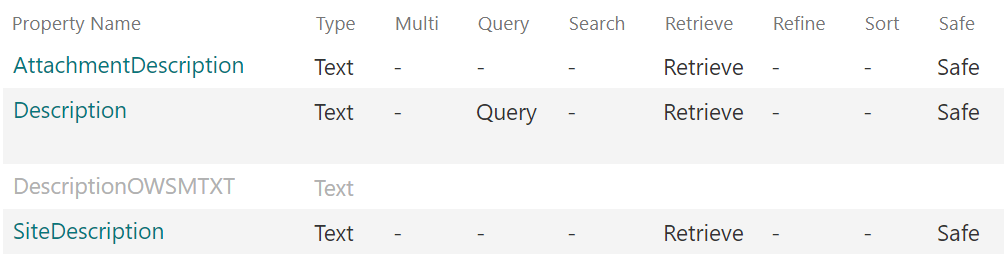
Searching for “ows_Description” crawled property gives me:

and that’s OK, as we have no data in the list so “ows_Description2” crawled property does not exist.

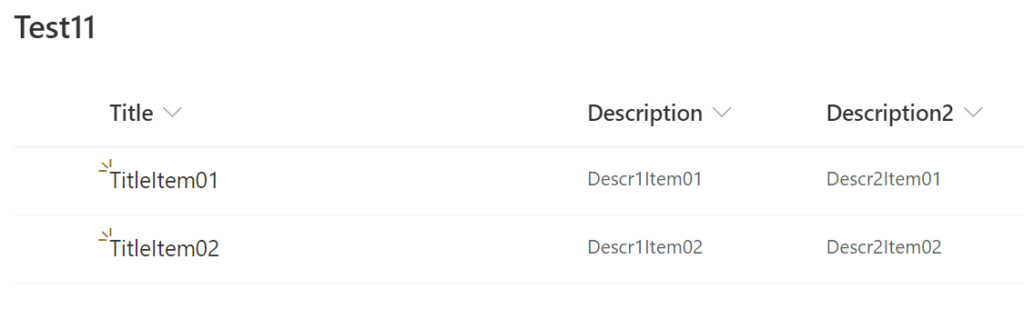
Now let me add some data to the list:

and wait a few minutes while continues crawl grabs data.

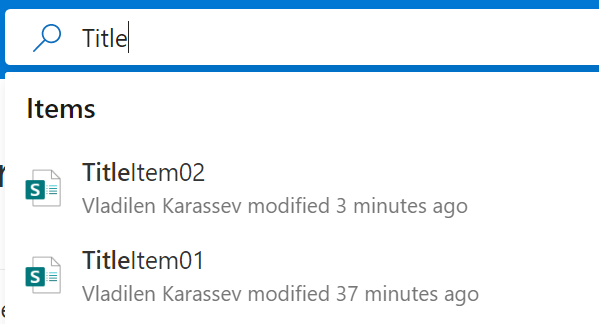
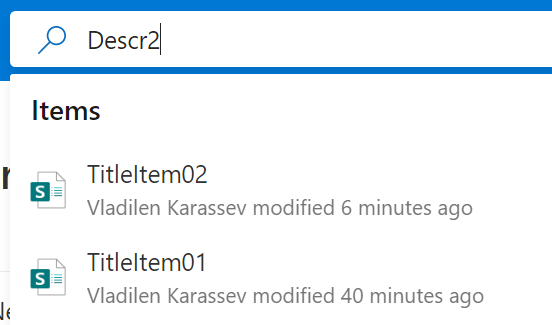
You can see:

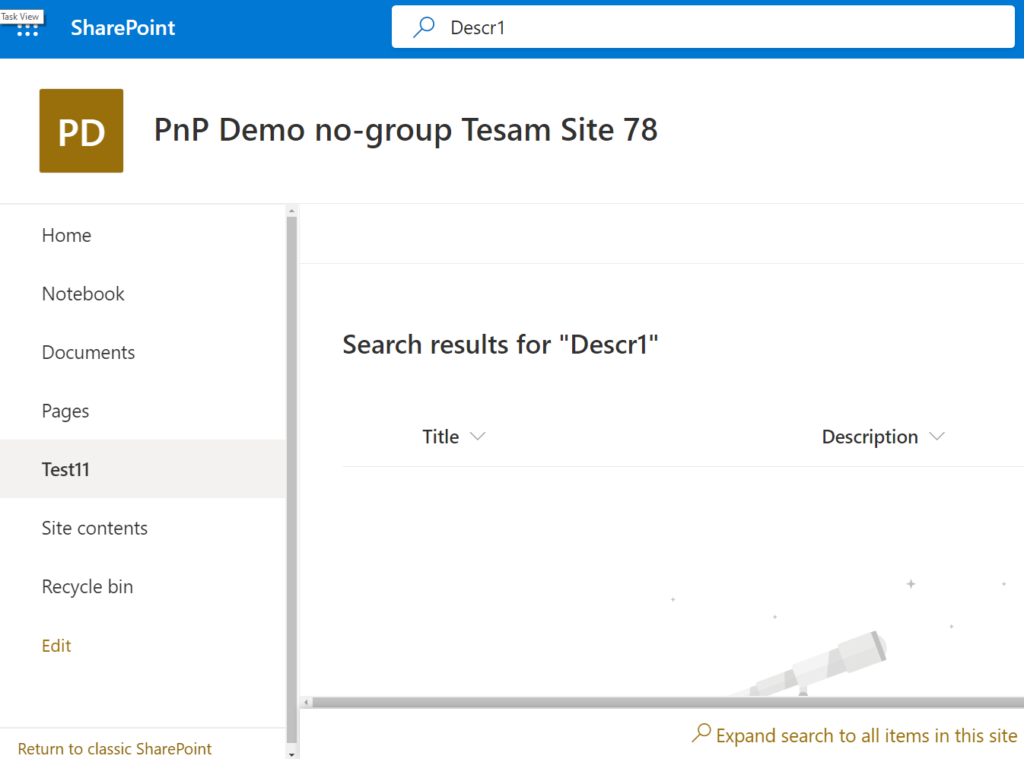
Title and Description2 are searchable, but we are not able to search through “Description” field content.

Explanation

Actually this is by design.
Microsoft: “The index only includes content and metadata from the managed properties”.
(Maybe Microsoft tries to protect their resources from overloading or maybe they protect us from irrelevant results, but including entire document content in full-text search and at the same time not including properties like Document Subject – this does not make sense to me). So the sad fact is list column “Description” is mapped to non-searchable managed property by default.

“Searchable” means: “…The content of this managed property is included in the full-text index.” I.e. if the property is not searchable – “The content of this managed property is not included in the full-text index.” => that’s by design.

But – the good news – the property is Queryable!
Queryable “Enables querying against the specific managed property”.

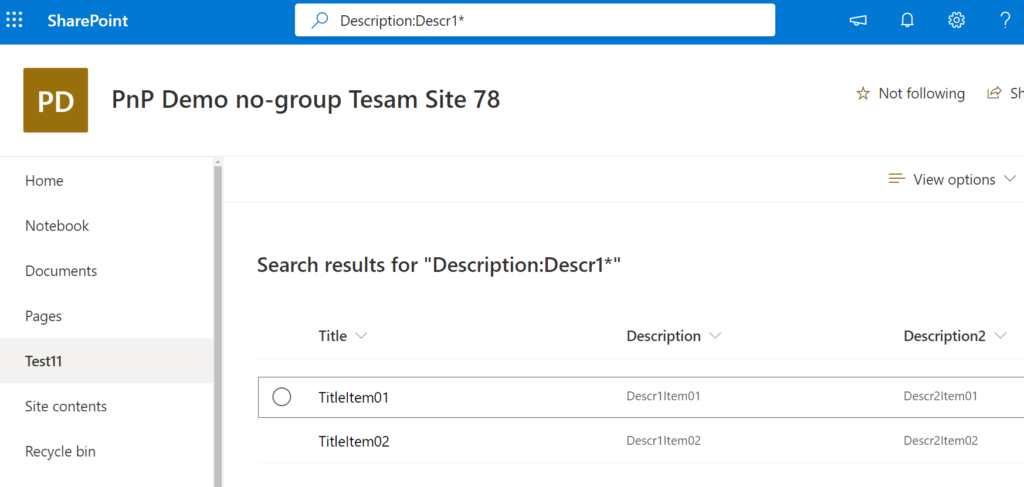
E.e. “Description:Descr1*” query should work. And it works:

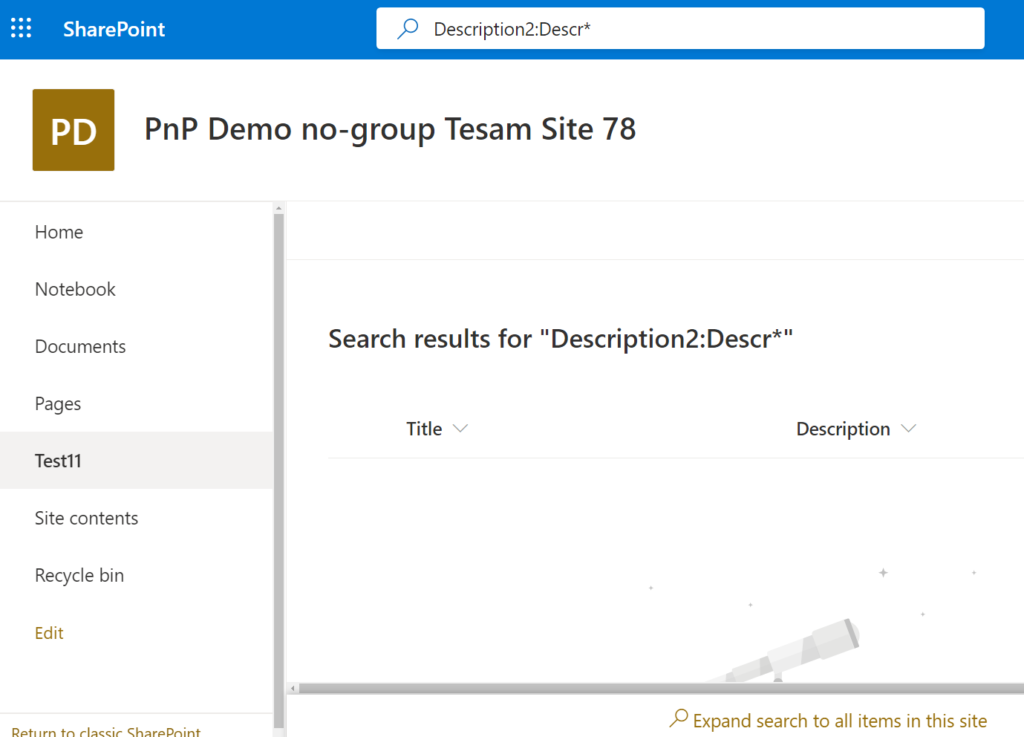
“Description2:Descr*” query should not work as we did not map Description2 property to any managed properties, so we can find content via full-text search but cannot find under managed property:

Solution

Option #1.
Use queries like “Description:TextToSearch” (check also SharePoint KQL).

Option #2.
Do not use name “Description”.
Choose something else like “Short Description” or “Case Description”

Option #3.
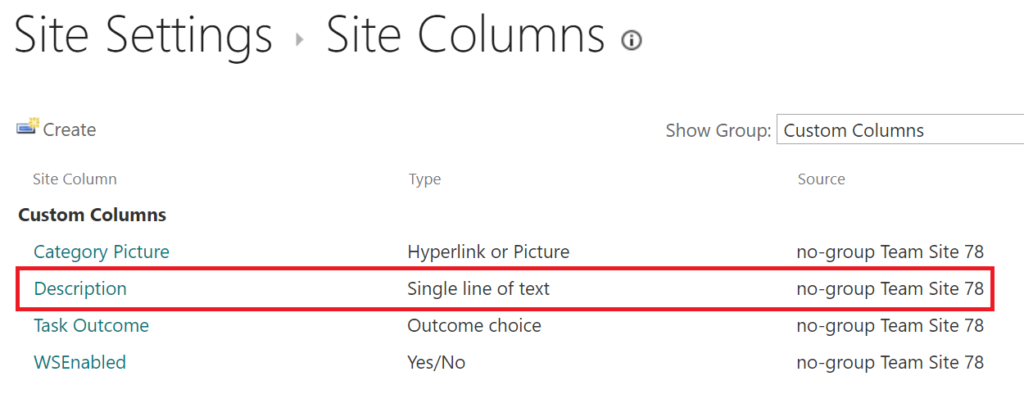
Use existing site column “Description” from group:Custom Columns. It’s “single line of text” though. Note: “SharePoint Server Standard Site Collection features” must be activated.

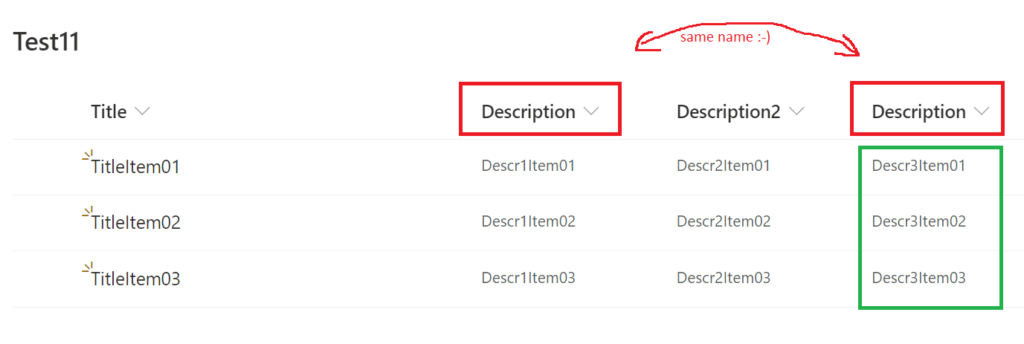
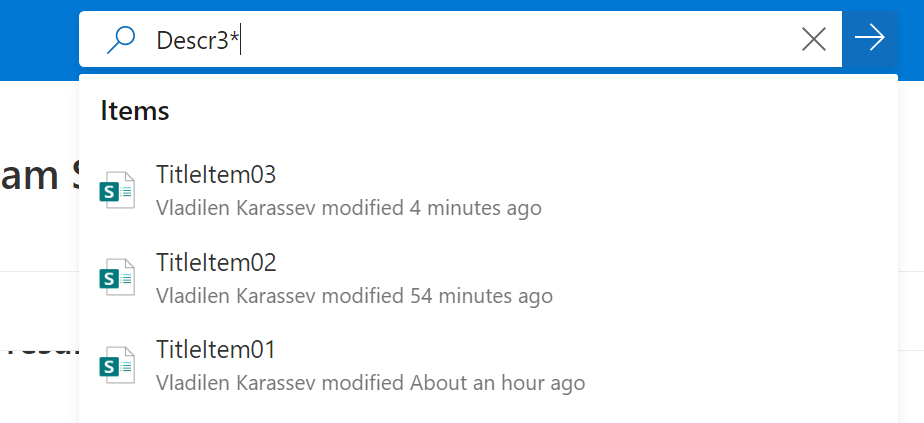
The thing is it’s internal name is “CategoryDescription” and display name is “Description”. So if you add this column to the list – the content will be searchable:

Option #4
Create a new site column, name it e.g. “DescriptionSrchblClmn”.
Add this column to the list from existing site columns.
Rename it to “Description”.

Option #5.
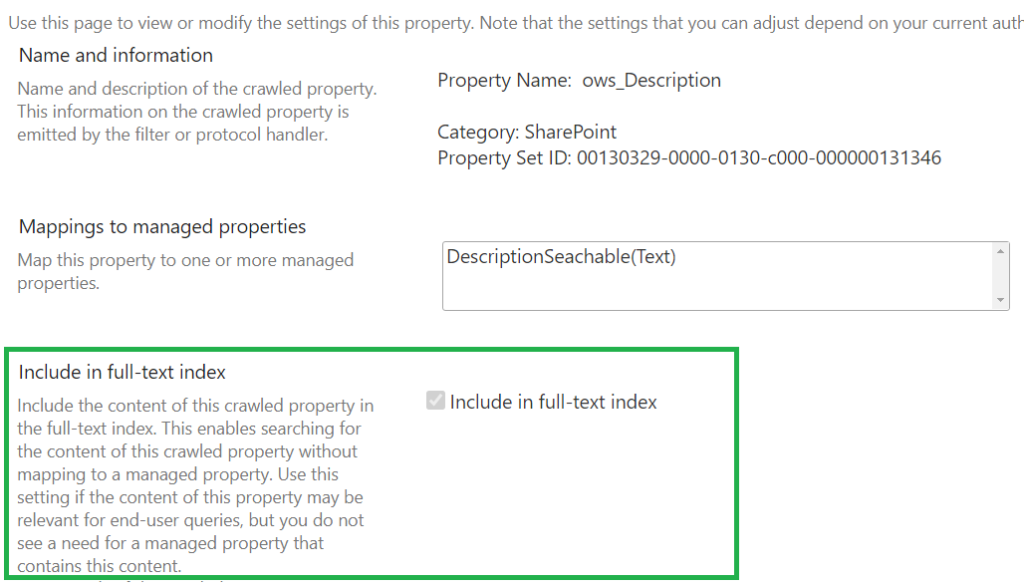
Create your own managed property (e.g. “DescriptionSearchable”), make it searchable and map it to “ows_Description” crawled property.

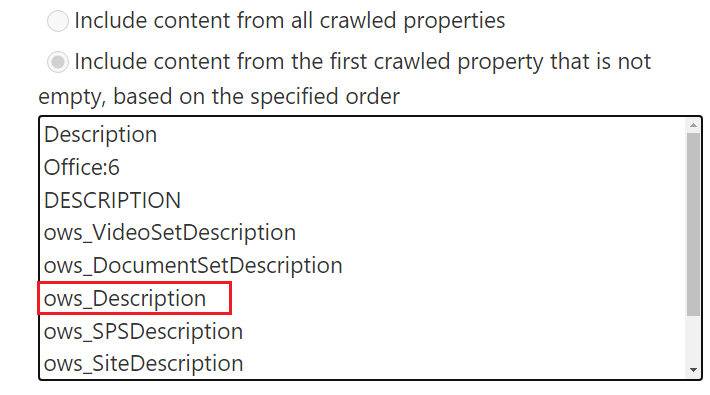
ensure crawled property has “Include in full-text index” option ON:

NB: changing search schema affects other site lists/libraries.

Remember: if you made a change in search schema, run “Reindex site” under Site Settings -> “Search and Offline Availability”. It’s like on-prem “Full crawl” but works at web level.

================================

Links.

Microsoft: Manage the search schema in SharePoint
Microsoft: Keyword Query Language (KQL) syntax reference
Vladilen: Search for a crawled property name with wildcards
Microsoft: Overview of crawled and managed properties in SharePoint Server

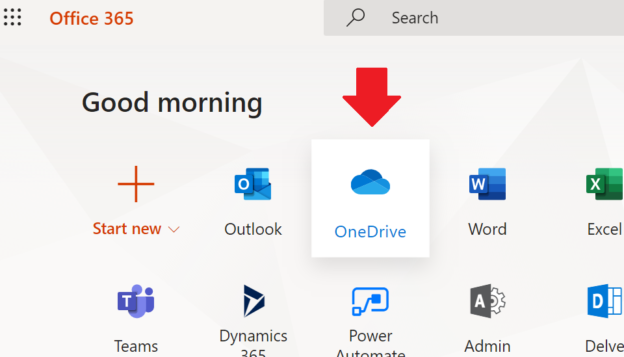
Office.com OneDrive icon

OneDrive vs OneDrive vs Personal Site


Microsoft sells OneDrive as a personal cloud storage service… But There are actually two separate products behind the service, and each product provides more than “personal cloud storage service”…

What is OneDrive? What is the difference between OneDrive and Personal SharePoint site? Let’s see…

When you login to Office.com, you can click on OneDrive icon:
Office.com OneDrive icon

and you will found yourself at OneDrive site, so

one OneDrive is a SharePoint Personal site:

OneDrive - SharePoint Personal Site

The other OneDrive is a desktop application

i.e. program that runs in the background and synchronizes files from your personal SharePoint site (“first OneDrive”) to your local machine and back:

OneDrive as a desktop application - installed

OneDrive as a desktop application - running OneDrive as a desktop application - running in the background

Below is OneDrive desktop application in Windows File Explorer. Please notice how “test 01.txt” file and “test 02” folder are synchronized to first OneDrive.

OneDrive desktop application syncs data from Personal SharePoint Site

Confused? No? Wanna more?

Here are some more confusing details…

Using OneDrive desktop application you can synchronize your regular SharePoint site library with your desktop computer.

Here is a regular SharePoint site (Test23) with a LibUnderSharePoint library. You can click on the “Sync” button:

SharePoint site Library - Synchronized to Onedrive

and see the magic! Now you have another folder on your local Windows machine:

OneDrive Syncs SharePoint site

– but this time OneDrive synchronizes it to regular SharePoint site.


There is also a “Personal OneDrive” – the same as regular OneDrive but free…
(again, do not be confused: initially there was just OneDrive – free personal version and OneDrive for Business – version you could have with Office 365 subscription; now they are Onedrive and Personal OneDrive 🙂 )

OneDrive is a Microsoft thing. 
Google has “Drive File Stream” (Google drive)
Dropbox – Dropbox sync 


Search-for-a-crawled-property

Search schema: Search for a crawled property name wildcard


If you are managing SharePoint search, specifically if you are customizing SharePoint search schema, especially in SharePoint Online (Office 365) – you know how slow it works and how tiresome it is to “Search for a crawled property name”.

Search-for-a-crawled-property

Recently I found out that wildcard works. No, even two wildcards work! 

In this example I need crawled property started from ows and contains doc and type:

SharePoint search through crawled properties


SharePoint 2010..2019 keys and images

SharePoint 2010/2013/2016/2019 download images and product trial/evaluation keys

Installing SharePoint on-prem? Need an image and a product key? Looking for an Office 365 subscription? Here you go.

Product keys for Microsoft SharePoint 2019, 2016, 2013, 2010: 

  • SharePoint 2019 Enterprise product key: M692G-8N2JP-GG8B2-2W2P7-YY7J6 (trial)
  • SharePoint 2019 Standard product key: F2DPD-HPNPV-WHKMK-G7C38-2G22J (trial)
  • SharePoint 2019 Project Server license key: R9946-QXNHR-62JPQ-3H3QC-TMWJT (trial)
  • SharePoint 2016 RTM evaluation key: NQGJR-63HC8-XCRQH-MYVCH-3J3QR
  • SharePoint 2013 Evaluation key: NQTMW-K63MQ-39G6H-B2CH9-FRDWJ
  • SharePoint 2010 Standard trial key: PTTCF-PCY26-D9V8F-8JF8B-XH8JP
  • SharePoint 2010 Enterprise trial key: VK7BD-VBKWR-6FHD9-Q3HM9-6PKMX

SharePoint 2019

SharePoint 2019 Server is available to download from Microsoft Evaluation Center: 

SharePoint Server 2013-2016:

SharePoint Server 2016 @ Microsoft Download Center

Microsoft SharePoint Server 2013 

Microsoft Evaluation Center

Step-by-step guide – how to setup SharePoint with AutoSPInstaller
 

Microsoft Teams and Office 365

free Microsoft Teams plan for home or business:
Compare Microsoft Teams Online Options | Microsoft Teams

trial Microsoft 365:
Compare All Microsoft 365 Plans | Microsoft

free Office 365 (for developers only):
https://developer.microsoft.com/en-us/microsoft-365/dev-program (no credit card required)

ecm.kz domain for sale

Домен ecm.kz выставлен на продажу.
Прошу 1млн 200 тыс тг.
Отвечу на разумное предложение.

Связаться со мной можно через форму:

Allow commenting on modern pages in SharePoint Online

Microsoft: “You can also select to allow or prevent commenting on modern pages. If you allow commenting, it can be turned on or off at the page level“

By default both
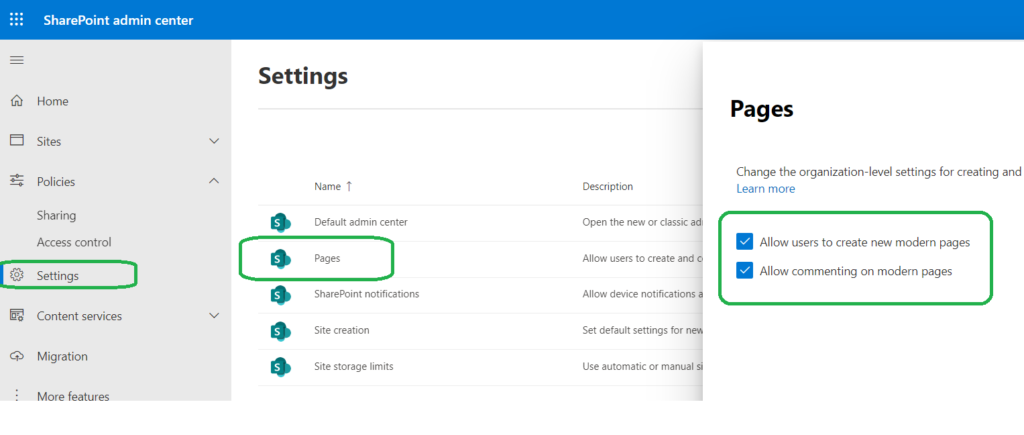
– Allow users to create new modern pages
– Allow commenting on modern pages
are turned on (enabled)

Tenant or SharePoint admin can find settings under
SharePoint Admin Center -> Settings -> Pages

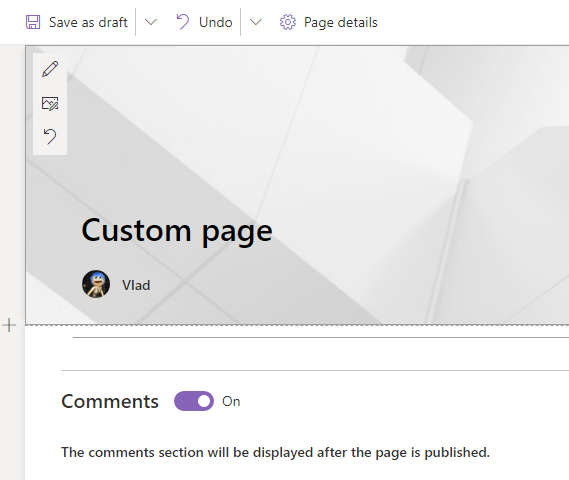
When you are creating a modern site page – there is an option “Comments” turned On by default:

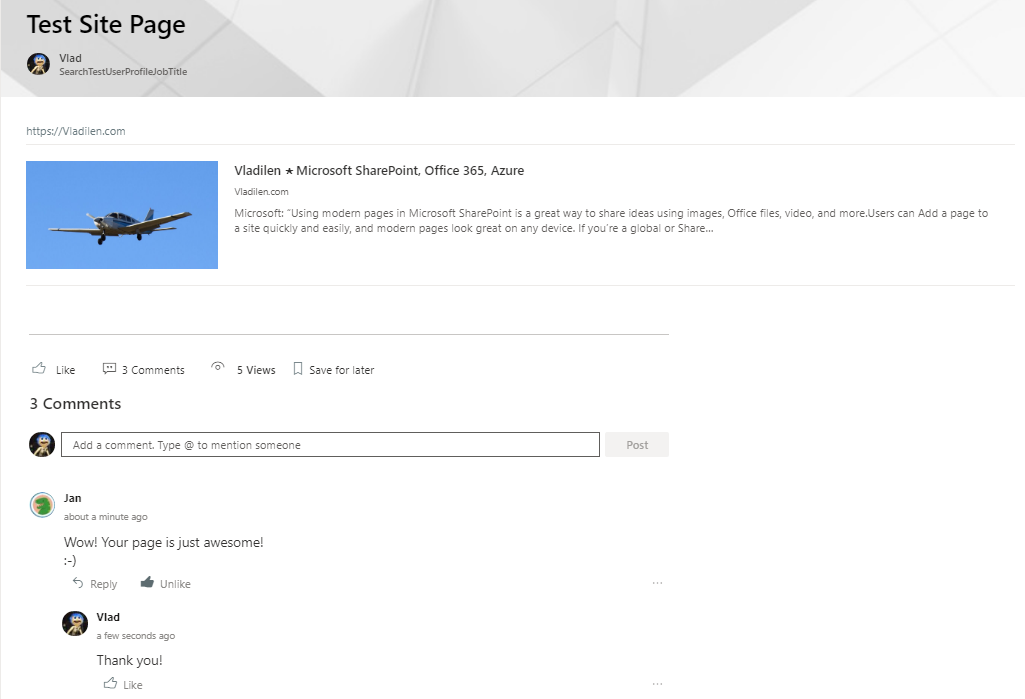
And page with comments looks like:

Comments on site pages (aka modern pages) can be enabled or disabled at each of the levels:
– Tenant level
– Site (aka site collection) level
– Web (aka subsite ) level
– Page level
Here is how it is done:

LevelHow it’s doneWho can do it
TenantGUI ( SharePoint Administration)
or PowerShell
Global Administrator or
SharePoint Administrator
Site (Site Collection)PowerShellGlobal Administrator or
SharePoint Administrator
Web (Subsite)PowerShellSite Collection Administrator or Owner
(Full Control rights to web)
PageGUI (Page Editing screen)Site Member
(Edit right to page)

If commenting on modern pages disabled at higher level – lower level settings do not work. E.g. If you disable “Allow commenting on modern pages” at tenant level (it takes minutes) – the functionality will gone from all modern pages of all sites.

When you switch page comments Off – all existing comments will be hidden (but not deleted).
If you later turn comments On – comments will reappear, including Likes.

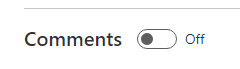
If “Allow commenting on modern pages” disabled at tenant or web level – you will not see “Comments On/Off” switch while editing page.
If “Allow commenting on modern pages” disabled at site collection level – you will see “Comments On/Off” switch while editing page, but you will not be able to turn it ON.

PowerShell

When you disable “Allow commenting on modern pages” at tenant level –
PowerShell Object (site/web) property “CommentsOnSitePagesDisabled” will not be changed for any site/web.
You can still with PowerShell set it to True/False:
“Set-PnPWeb -CommentsOnSitePagesDisabled:$false”
but it does not take any effect.

If you enable “Allow commenting on modern pages” at tenant level (it takes ~10 minutes) – the functionality will return to all modern pages and
all webs and sites properties “CommentsOnSitePagesDisabled” will ???.
You can change it with PowerShell:
“Set-PnPWeb -CommentsOnSitePagesDisabled:$false”.

# having Site Collection Admin Permissions:
# disable Comments On Site Pages for a subsite:
$webName = "SubSite_02"
Set-PnPWeb -Web $webName -CommentsOnSitePagesDisabled:$true 
# enable Comments On Site Pages for a subsite 
# (only if comments enabled at tenant level):
Set-PnPWeb -Web $webName -CommentsOnSitePagesDisabled:$false


# having global admin or SharePoint admin permissions:
# site collection:
Set-PnPTenantSite -Url $siteUrl -CommentsOnSitePagesDisabled:$true
# tenant-level Comments:
Set-PnPTenant -CommentsOnSitePagesDisabled:$true # disable
 comments
Set-PnPTenant -CommentsOnSitePagesDisabled:$false # enable comments

# does not work:
Set-PnPSite -CommentsOnSitePagesDisabled:$true

How do I know if if the page is modern page or classic page (PowerShell)?

$list = Get-PnPList "Site Pages" -Includes ContentTypes, Fields
$list.ContentTypes | ft -a
$cType = Get-PnPContentType -List $list | ?{$_.Name -eq 'Site Page'};
$cType.id
$queryString = "<View><Query><Where><Eq><FieldRef Name='ContentTypeId'/><Value Type='Text'>" + $cType.Id.StringValue + "</Value></Eq></Where></Query></View>"  
$modernPages = Get-PnPListItem -List $list -Query $queryString
$modernPages.count
$modernPages | ft -a

How do I know if the page is a Home Page (PowerShell)?

# web object contains relative link to the web's Home Page:
$web = Get-PnPWeb -Connection $siteConnection -includes WelcomePage
$web.WelcomePage

References

– Microsoft “Allow users to create and comment modern pages“

See also:
– Allow users to create modern pages

Note:
We did not discuss “Wiki Pages” or “Web part Pages”, we discussed only “Modern Pages” (aka Site Pages).
I have tested it all personally using Communication sites.
MS-Team (group-based) and standalone SharePoint (no-group) sites – TBP.

Orphan SharePoint sites vs orphan content databases

Note: the article below is for on-prem SharePoint. For Microsoft 365 orphan/ownerless resources – sites, groups – please check 
– Ownerless Microsoft 365 groups, teams and sites Q&As 
– Microsoft 365 ownerless groups policy email template format and content
– Orphan Microsoft 365 groups in large environments

Remove orphan sites from SharePoint content database

Problem: When you patch SharePoint or perform database-attach migration or just do Test-SPContentDatabase, sometimes you can see errors with category “SiteOrphan”. Although it says “UpgradeBlocking : False”, Ignoring this error may cause severe issues, even data loss.
Continue reading →

step-by-step SharePoint Setup with AutoSPInstaller

(the article is under construction)

How to setup SharePoint 2013/2016/2019 using AutoSPinstaller

the quick and easy way which can be used in your lab environment, as well in test and even in production and later be scaled-out, as performance and/or availability requirements grows up

Assume 3-tier topology – Front-End Server, Batch-Processing Server and SQL Server. Accounts according to least privilege principle.

Treat all server names, account names and domain names in this article are “for example”, i.e. you should use your own names.

What you must already have/get:

  • AD (Active Directory)

Prepare (request) hardware (virtual machines):

  • SP16SQL1 for SQL Server 2016
  • SP16WFE1 for SharePoint 2016 Front-End Roles
  • SP16BPS1 for SharePoint 2016 Batch-Processing Roles

SP16SQL1 for SQL Server 2016

refer to Microsoft SharePoint 2016 requirements for hardware specifications, but as minimum:

  • any 64-bit 4-core server CPU
  • RAM 4 GB for lab/test and 16+ GB for prod
  • HDD min 80 GB for system drive, 80 GB drive for application/data

Install MS Windows Server 2016 with GUI.
Configure time zone and time, static IP, name, language, region.
Add to domain.
Add App Server role, install updates, check event logs, resolve errors if any.

SP16WFE1 and SP16BPS1 for MS SharePoint 

refer to Microsoft SharePoint 2016 requirements for hardware specifications, but as minimum:

  • any 64-bit 4-core server CPU
  • RAM 8-12GB for lab/test and 16-24GB for prod
  • HDD min 80GB for system drive, 80GB drive for application

Install MS Windows Server 2016 with GUI.
Configure time zone and time, static IP, name, language, region.
Add to domain.
Add App Server role, install updates, check event logs, resolve errors if any.

Create (request) AD accounts:

– SQL-Adm
– SQL-Svc

– SP-Adm
– SP-Farm
– SP-Svc
– SP-PortalAppPool
– SP-ProfilesAppPool
– SP-CacheSuperUser
– SP-CacheSuperReader
– SP-ProfileSync
– SP-SearchService
– SP-SearchContent
– SP-ExcelUser
– SP-VisioUser
– SP-PerfPointUser

and

– SP_farm_administrators security group

add SP-Adm (and personal admin accounts) to SP_farm_administrators group

provide “Replicate Directory Changes” AD permissions to SP-ProfileSync account (refer to this how to article)


SQL Server:
add SQL-Adm to local administrators

SP Server:
add SP_farm_administrators group to local administrators group

Setup

on SQL Server:
login as SQL-Adm to install  MS SQL Server 2016

  • start MS SQL Server 2016 setup
  • features: Database Engine Services, (optional) Reporting Services – SharePoint
  • Directories: change to non-system drive
  • (optional) name instance
  • Service Accounts: use SQL-Svc as service account for SQL Server Agent and SQL Server Database Engine 
  • Server Configuration: AddCurrentUser
  • Data directories: ensure non-system drive is used
  • Windows Firewall and Advanced Security->Inbound Rules->New Rule->
    • Port TCP 1433-1434 Allow
    • Port UDP 1434 Allow

since “SQL Server Management Studio” is not a part of SQL Server, but distributed separately, you need to

  • download “SQL Server Management Studio” (any version – 2016+) and
  • install it on any machine – SQL, SharePoint or your personal workstation, then
  • start SQL Server Management Studio->Security->Logins
    • add SP_farm_administrators with roles securityadmin, dbcreator, public
  • SQL SQL Management Studio->Right Click on instance name->select properties->Advanced->Change Max Degree of Parallelism to 1

on SharePoint Server:
login as SP-Adm

  • (optional) setup MS SQL Server 2016 feature Reporting Services – add-in for SharePoint
  • check connection to SQL server
    • create empty file with extention .udl (create text file and rename it to sql.udl)
    • double-click it
    • enter server name, choose Windows NT integrated security, select database, Test Connection
    • if failed – check on SQL Server if protocol TCP/IP activated for remote access (SQL Server Configuration Manager -> SQL Server Network Configuration -> Protocols… -> TCP/IP -> Enable)
      check firewall
  • download AutoSPInstaller, unzip it, explore content

Generally, the steps are

  • install/configure prerequisites (Windows roles, some additional software)
  • install SharePoint binaries (SharePoint itself, language packs, updates)
  • create/configure farm (create configuration database, service applications, web applications etc.)

AutoSPInstaller is able to handle all steps, but personally I prefer to install prerequisites and SharePoint manually, and use AutoSPInstaller only to create/configure farm. If so, we will need only “Automation” folder from autospinstaller.zip

Prerequisites

I’d recommend copy all content from source SharePoint image to a folder. 

run prerequisiteinstaller.exe. It will take care of

  • Web Server (IIS) Role
  • Microsoft SQL Server 2012 Native Client
  • Microsoft ODBC Driver 11 for SQL Server
  • Microsoft Sync Framework Runtime v1.0 SP1 (x64)
  • Windows Server AppFabric
  • Microsoft Identity Extensions
  • Microsoft Information Protection and Control Client 2.1
  • Microsoft WCF Data Services 5.6
  • Microsoft .NET Framework 4.6
  • Cumulative Update Package 7 for Microsoft AppFabric 1.1 for Windows Server (KB3092423)
  • Visual C++ Redistributable Package for Visual Studio 2012
  • Visual C++ Redistributable Package for Visual Studio 2015
     

(optionally, you can run powershell:

Add-WindowsFeature Web-Server,Web-WebServer,Web-Common-Http,Web-Static-Content,Web-Default-Doc,Web-Dir-Browsing,Web-Http-Errors,Web-App-Dev,Web-Asp-Net,Web-Net-Ext,Web-ISAPI-Ext,Web-ISAPI-Filter,Web-Health,Web-Http-Logging,Web-Log-Libraries,Web-Request-Monitor,Web-Http-Tracing,Web-Security,Web-Basic-Auth,Web-Windows-Auth,Web-Filtering,Web-Digest-Auth,Web-Performance,Web-Stat-Compression,Web-Dyn-Compression,Web-Mgmt-Tools,Web-Mgmt-Console,Web-Mgmt-Compat,Web-Metabase, WAS,WAS-Process-Model,WAS-NET-Environment,WAS-Config-APIs,Web-Lgcy-Scripting,Windows-Identity-Foundation,Xps-Viewer 

an then prerequisiteinstaller.exe )

It might require you to restart the server, then prerequisiteinstaller.exe will continue until you see “Installation Complete” message. Finally you must see “Installation Complete. All required prerequisites have been installed or enabled” message.

Now run setup.exe

Be ready to provide your SharePoint product key. You can use SharePoint trial key from here for test or evaluation environment. 

From Server Type choose “Complete” (for SharePoint 2013 only – option chosen by default).

NB! Choose File Location on “File Location” tab. I’d recommend install SharePoint on separate drive (e.g. E:).

Note that it says: “If you intend to use this computer as a search server, the search index files will be stored on the local drive. These files can be very large , so ensure that there is sufficient free space on the selected drive. To change where Microsoft SharePoint Server 2016 will store it’s index files…”

You might say that it is possible to configure index files location during provisioning Search Index component. 
Yes, I absolutely agree. But! There is also Analytics Processing Component, and during it’s work, it generates temporary files under “C:\Program Files\Microsoft Office Servers\15.0\Data\Office Server\Analytics_GUID\AE\AnalyticsProcessingComponent1” which might be very big in size, and that location could not be “legally” changed. So if you miss this point, you might be required to reinstall SharePoint binaries later. See also this. 

After binaries installed, you should see “Run Configuration Wizard” “To complete configuration of your server, you must run the SharePoint Product Configuration Wizard”… 
Remove the checkmark “Run the SharePoint Product Configuration Wizard now” (untick this).
I.e. Do not run Product Configuration Wizard for now. Farm will be configured later via PowerShell AutoSPInstaller script.

If you need language packs – it’s time to install language packs. 

Now you are good to install Cumulative Update. Latest for test/lab environment, latest tested for production. Check updates against regressions (e.g. with Todd Klindt). 

Do not run Product Configuration Wizard.

Now let us have a closer look into AutoSPInstaller Automation folder.

у AutoSPInstallerInput.xml убираем атрибут “read only” файловой системы
AutoSPInstallerInput.xml правим так:
        <PIDKey></PIDKey> вбиваем ключ (можно триальный отсюда, потом вручную сменим на постоянный)
        <SKU>Enterprise</SKU> вбиваем Standard или Enterprise (ключ тогда должен быть соответствующий)
        <AutoAdminLogon Enable=”false” Password=”” /> вбиваем true и пароль, если хотим чтобы сервер каждый раз сам логинился (предполагается несколько перезагрузок)
        <Passphrase></Passphrase> вбиваем пароль/ключ (используется для присоединения дополнительных серверов к ферме)
        <Account…  везде, где встречаем DOMAIN\ или @domain, исправляем на наши реальные данные так:
            <Username>DOMAIN\SP_Farm</Username> , заменяем DOMAIN на настоящее имя нашего домена, оставляем название и имя учётки (SP_Farm) как есть
            <Password></Password> вбиваем пароль
            <Email>spfarm@domain.com</Email> вбиваем e-mail
        <CentralAdmin Provision=”true”>… ставим порт какой удобно, например <Port>2013</Port>
        <Database> первое упоминание делаем так
           <DBServer></DBServer>  вбиваем алиас для SQL Server (например <DBServer>SP3SQLAL</DBServer>)
                     DBInstance=”SERVER\INSTANCE” правим на только имя сервера (например, DBInstance=”SP3SQL1″)
            <DBPrefix>AutoSPInstaller</DBPrefix> меняем на удобный нам, например <DBPrefix>SP</DBPrefix>
        остальные упоминания <Database> не трогаем (оставляем пустыми как есть)
        <ManagedAccounts> домен и пароль  меняем на свой, всё остальное – названия акаунтов и сами акаунты – оставляем как есть
        <Logging><LogDiskSpaceUsageGB></LogDiskSpaceUsageGB> поставить приемлемое для своего дискового пр-ва значение, например 5
        <AppManagementService если вы в состоянии это сделать, то оставляем Provision=”true”
                и следуем инструкциям, например Setting up your App domain for SharePoint 2013
                иначе – ставим Provision=”false”

  • Собственно установка
    • Запускаем от имени администратора (Run As Administrator) батничек AutoSPInstallerLaunch.bat
    • Но не идём курить, как некоторые советуют, а пьем чай и наблюдаем, т.к. иногда срабатывает UAC и надо тыкнуть “OK”
    • Если скрипт почему-то “слетает”, то смотрим “почему”, поправляем и запускаем снова, ничего не меняя в других настройках.

Последействия:
        <AutoAdminLogon Enable=”false” Password=”” /> стираем пароль
        <Passphrase></Passphrase> стираем

поправить параметры логирования под себя

если есть exchange, можно настроить OutgoingEmail и сам Exchange


Notes:

if you plan federated SharePoint environment, i.e. having Publishing (Service) Farm and Consuming (Content) Farm – plan for SQL aliases carefully.


Sources:

Brian Lalancette: AutoSPInstaller 

Technet: Account permissions and security settings in SharePoint 2013
Technet: Install SharePoint 2013
Technet: Hardware and software requirements for SharePoint 2013
CodePlex: Automated SharePoint 2010/2013 PowerShell-based installation script
Technet: virtual environment for SharePoint 2013
Setting up your App domain for SharePoint 2013

F5 Load Balancing for SharePoint 2016


Management Tools Basic+Complete;