Tag Archives: Hints

Removing a user from the Everyone Except External User group in SharePoint Online

A common question in SharePoint Online is: How can we block access for a specific user to all sites? In SharePoint Server (On-Premises), this was relatively simple—we could apply a “Deny” policy at the web application level. However, SharePoint Online doesn’t expose web application settings, so there’s no direct way to say, “Block this user from accessing SharePoint.”

In SharePoint Online, access is granted—not explicitly denied. To prevent a user from accessing SharePoint content, you must ensure they are not granted access in the first place. This becomes tricky due to the built-in group “Everyone except external users”, which automatically includes all internal users. If a site or resource is shared with this group, the user in question will also gain access—there’s no way to exclude them from this group.

Despite this limitation, there is a workaround. While you can’t remove a user from the “Everyone except external users” group, there are strategies to restrict their access effectively. Consider the following options (and we’ll deep dive in all options, discussing pros and cons):

  1. Stop Using “Everyone except external users” for Permissions and
  2. Block Access via Conditional Access
  3. Make the user “Internal Guest”

(bonus) Validate the user does not access SharePoint

1. Stop Using “Everyone except external users” for Permissions

To exclude (hide) “Everyone Except External Users” claim in People Picker – you’d use

Set-SPOTenant -ShowEveryoneExceptExternalUsersClaim $false

Though this option looks simple at first – it would require some extra work, because

  • you’d need to deal with existing shares with “Everyone Except External Users”
    should you remove all shares with “Everyone Except External Users”? What to replace it with?
  • you’d need to deal with “public” groups, teams, sites
    Public group-based site (team) will have “Everyone Except External Users” in members by default and even if you remove it – it’ll be added again automatically (?)
  • you’d need to provide an alternative for scenarios where sharing with everyone is a requirement
    what alternative? See below.

Assign Permissions Using Custom Groups

The idea is to create a custom security group (e.g. “All internal users”) or a couple of custom security groups (e.g. “All employee” and “All contractors”) and include in these groups all users who we want to have access to SharePoint except those who we want to keep out of SharePoint. Again, sounds simple, but I anticipate the following challenges.

You do not want to manually add every new account to these groups. So these groups must be dynamic – if so – you’d need to figure out criteria – consequently you’ll end up creating a custom user property and you’d have to setup this property. Alternatively – you’d need to automate assigning users to these groups as part of onboarding.

If you are a part of enterprise with on-prem directory synced to cloud – you’d told by Identity management that this is a very bad idea – to sync 99,900 accounts out of 100,000 total accounts to a custom group.

So, this option – using custom security group as an alternative to “Everyone Except External Users” would work well in small tenants, but in medium and large – would require some extra work.

2. Block Access via Conditional Access

You can create a Conditional Access Policy to block access for specific users to SharePoint Online from Microsoft Entra Admin Center -> Security > Conditional Access. You’d create a new policy, select the user(s) to exclude, select app – Office 365 SharePoint Online, choose Block access. Once the policy enabled, the selected user(s) will be blocked from accessing SharePoint Online and OneDrive.

First of all this option might cost you some money, as it requires Azure AD Premium P1 or P2 (or
Microsoft 365 Business Premium or Microsoft 365 E3 or E5).

Second, as it says, your user in question will be fully blocked from accessing SharePoint Online and OneDrive. But what if they still need access a few sites while being removed from ‘Everyone Except External User’ group?

3. Make the user “Internal Guest”

This option is not so obvious, but in many cases might work better than all others. Here is the idea. Actually it is not always external users are guests and internal users are members. You can have internal guests and external members (see this Microsoft’s article). There is a property in Entra Id – “User type” and usually it’s a “Member” for internal users – users created in Entra Id or synced from on-prem AD. External users are usually have User type as “Guest”. Only users with type “Member” are included in the built-in “Everyone Except External User” group.

So you’d need to change user type in Entra Id from Member to Guest – and in a couple of hours this user will loose all access to SharePoint provided via “Everyone Except External User” group. But, at the same time – you’ll be able to provide access for this user on individual basis.

Note: changing user type from Member to Guest comes with important implications and limitations. In a nutshell, a user becomes a Guest, e.g. a user cannot browse the full directory, have restricted access to Microsoft 365 Groups and Teams features. Changing the user type may affect audit trails, compliance policies, and conditional access rules that differentiate between internal and external users.

Validate the user does not access SharePoint

This is not an answer to question “How to remove a user from “Everyone Except External User” group”, but answer to question “How to ensure a user is not a part of “Everyone Except External User” group” or “How to ensure a user does not have access to SharePoint if access is provided via “Everyone Except External User” group”.

  • site admin can check user’s permission via Site settings – Advanced – Permissions – Check Permissions
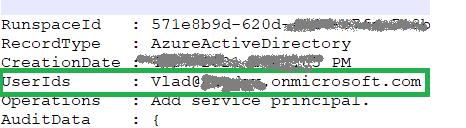
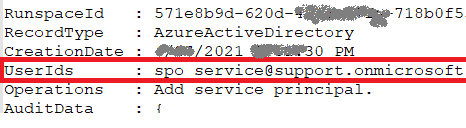
  • SharePoint admin can check audit log

Note: Removing a user’s SharePoint license does not remove their access if permissions are still granted via this group

Ownerless group policy configuration failed

If you are seeing “Ownerless group policy configuration failed” and “Please try again.” error message:

there might be some different reasons:

  1. Microsoft said it is (was) a know problem – it happens sometimes (timeout?), if you configured the policy properly and have enough permissions.
    So just go back one step and try again – all should be good.
  2. Sometimes “Ownerless group policy configuration failed. Failure in configuring ownerless groups policy” is a permissions issue
    SharePoint admin, Teams admin: cannot configure Ownerless Groups Policy
    Global admin: yes, can configure Ownerless Microsoft 365 Groups Policy.
    What is the minimum role required?
    According to a recent update of the Microsoft’s article – “A Global administrator can create a policy…”. In my experience – groups admin can also configure the policy

Note: Groups admin when configuring the policy can see warning message “You don’t have permissions to save changes”.
No worries 🙂 => You will be able to save changes 🙂

Video tutorial on the policy configuration (at around 5:00 you can see this error message):

How to create an old document in SharePoint

Sometimes, mostly during PoC or testing policies like retention policy or lifecycle policy you would need some documents created and updated weeks, months or even years ago.

But if you create or upload a document in SharePoint library – it will be just a regular new document. So, how to get old documents in the new environment?

I see two options:

  1. Sync with OneDrive
    If you sync a library with your local folder (done Microsoft by OneDrive desktop app) and put some old document in your synced folder – the doc will be synchronized back to SharePoint library with Created and Modified properties preserved.
  2. Make the document older with PowerShell
    With “Set-PnPListItem” PowerShell command you can update not only such properties like Title, but also “Created By”, “Modified By” and even date and time document was created and modified via “Created” and “Modified”.
    Optionally you can play with document history with “-UpdateType” parameter.
    UpdateType possible values are:
    • Update: Sets field values and creates a new version if versioning is enabled for the list
    • SystemUpdate: Sets field values and does not create a new version. Any events on the list will trigger.
    • UpdateOverwriteVersion: Sets field values and does not create a new version. No events on the list will trigger

Microsoft 365 Q&A

Q: What permission or role is required to get search Usage analytics reports
A: To see Microsoft 365 Search and intelligence usage analytics reports you’d need “Global reader” or “Search editor” role.

Q: What permission or role is required to get access to Search Feedback under Microsoft 365 admin center – Settings – Search & intelligence – Insights – Feedback
A: You’d need at least “Global reader” or “Search editor” role.

Track SharePoint App-only Service Principals in Microsoft 365

Update (Feb 2025):
A new KBA: Azure ACS retirement: Track down ACS apps

Update (May 2023):
You can use Get-PnPAzureACSPrincipal to returns the lists of all Azure ACS principals installed in your Tenant including subsites.

Update: Sites.Selected API MS Graph permissions was introduced by Microsoft in 2021. It was a good move towards site-level development, but still developers were limited with only what MS Graph API provides for SharePoint dev.
So devs had to use AppInv.aspx at site level to provide ACS permissions to their apps to be able to use SharePoint CSOM and REST APIs.
Recently Microsoft introduced Sites.Selected SharePoint API permissions for registered Azure Apps! So now devs should be fully happy without ACS-based permissions.

Update: I’m not sure when Microsoft implemented that, but I recently found another Record Type – “SharePointAppPermissionOperation”. There is an Activity type – AppPermissionGrant…
To be explored…

After all the updates the original article below is probably obsolete…

Scenario

Developers in the organization can use both – Azure Apps and SharePoint Apps to work with SharePoint sites in their “daemon” applications.

It is recommended to use Azure apps so, you want to know – what are SharePoint Apps registered and their owners, who registered SharePoint Apps. Eventually you would disable SharePoint Apps-only principal but before that you’d move Devs from SP-App-only to Azure App (see Disable Custom App Authentication).

(SharePoint App-only service principals aka SP-App-Only are SPN or App registered from within SharePoint using AppRegNew.aspx system page).

One of the approaches is to track Apps/Owners (or who register an app) with Unified Audit Log

Use Unified Audit Logs

The following PowerShell code:

$operations = 'Add service principal.'
$recordType = 'AzureActiveDirectory'
Search-UnifiedAuditLog -StartDate $start -EndDate $end -ResultSize $resultSize -Formatted -Operations $operations -RecordType $recordType

returns events with operation = ‘Add service principal.’ Nice, but…
if an app was registered in Azure – event contains an UPN under UserIds property:

Unfortunately, in case with registering app in SharePoint, an audit log event will be like:

i.e. UserId registered is “spo_service@support.onmicrosoft.com”, so we do not know who registered a SharePoint-only app

In theory – we could use events recorded immediately before and after “Add service principal” event to track a user and site who has registered a SharePoint-only app… But for me it seems like too complicated for automation.

Instead we can do simple search through audit log for events “AppRegNew.aspx page visited”. This gives us a good approximation of who registered SP-App-only principal. Worst scenario – we reach more people than we really need (including those who started registering sp-app-only but did not complete) but all of them would be definitely our target auditory.

Consider the following code:

$freeText = "appregnew"
$operations = 'PageViewed'
$recordType = 'SharePoint'

$results = Search-UnifiedAuditLog -StartDate $start -EndDate $end -ResultSize $resultSize -FreeText $freeText -Operations $operations -RecordType $recordType 

this would give you all users who loaded “/_layouts/15/appregnew.aspx” page

References

Power Apps functions/code hints

OnNew:
Set(SharePointFormMode, “NewForm”); NewForm(formNew); Navigate(screenNew, ScreenTransition.None)

OnEdit:
Set(SharePointFormMode, “EditForm”); EditForm(formEdit); Navigate(screenEdit, ScreenTransition.None)

OnView:
Set(SharePointFormMode, “ViewForm”); ViewForm(formView); Navigate(screenView, ScreenTransition.None)

OnSave – If(SharePointFormMode=”CreateForm”, SubmitForm(CreateItemForm), If(SharePointFormMode=”EditForm”, SubmitForm(EditItemForm)))

OnCancel – If(SharePointFormMode=”CreateForm”, ResetForm(CreateItemForm), If(SharePointFormMode=”EditForm”, ResetForm(EditItemForm)))

PnP.PowerShell Batches and PowerShell 7 Parallel

Parallelism

Can I use PowerShell 7 “-Parallel” option against SharePoint list items with PnP.PowerShell? Can I run something like:

$items | ForEach-Object -Parallel {
    $listItem = Set-PnPListItem -List "LargeList" -Identity $_ -Values @{"Number" = $(Get-Random -Minimum 100 -Maximum 200 ) }
} 

Yes, sure… But! Since it’s a cloud operation against Microsoft 365 – you will be throttled if you start more than 2 parallel threads! Using just 2 threads does not provide significant performance improvements.

Batching

So, try PnP.PowerShell batches instead. When you use batching, number of requests to the server are much lower. Consider something like:

$batch = New-PnPBatch
1..100 | ForEach-Object{ Add-PnPListItem -List "ItemTest" -Values @{"Title"="Test Item Batched $_"} -Batch $batch }
Invoke-PnPBatch -Batch $batch


Measurements

Adding and setting 100 items with “Add-PnPListItem” and “Set-PnPListItem” in a large (more than 5000 items ) SharePoint list measurements:

Add-PnPListItem
Time per item, seconds
Set-PnPListItem
Time per item, seconds
Regular, without batching1.261.55
Using batches (New-PnPBatch)0.100.80
Using “Parallel” option, with ThrottleLimit 20.690.79
Using “Parallel” option, with ThrottleLimit 30.44 (fails level: ~4/100) 0.53 (fails level: ~3/100)

Adding items with PnP.PowerShell batching is much faster than without batching.

More:

How to delete a large SPO list or all/some items in a large SPO list

Scenario: You have a large (>5k items) list in SharePoint Online you need to clean-up, for instance:

  • You need to delete the entire list
  • You need to delete all the list items, but keep the list
  • You need to delete some of list items, but keep the others

Deleting a large SharePoint Online list

There was a problem in SharePoint Online – you could not delete a large list – you had to remove all items first, but removing all items was also a challenge. Microsoft improved SharePoint Online, so now it takes ~1 second to delete any SharePoint list, including 5000+ items list via GUI or PowerShell:

Remove-PnPList -Identity $list

command works very fast – ~1 second to delete entire list with >5000 items.

Delete all items in a large SharePoint Online list

In this scenario we need to keep the list, but make it empty (clean it up).

GUI: You can change the list view settings “Item Limit” to <5000 and try to delete items in chunks, but (at least in my experience) when you try to select, let say, 1000 items and delete them via GUI – it says “775 items were not deleted from large list”:

so this option seems like not a good one.

ShareGate: 3-rd party tools like Sharegate, SysKit give a good results too.

PowerShell

Try this PowerShell command with ScriptBlock:

Get-PnPListItem -List $list -Fields "ID" -PageSize 100 -ScriptBlock { Param($items) $items | Sort-Object -Property Id -Descending | ForEach-Object{ $_.DeleteObject() } } 

or this PowerShell with batches:

$batch = New-PnPBatch
1..12000 | Foreach-Object { Remove-PnPListItem -List $list -Identity $_ -Batch $batch }
Invoke-PnPBatch -Batch $batch

for me both methods gave same good result: ~17 items per second ( ~7 times faster than regular).

Deleting some items from a large SPO list

Consider the following scenario: in a large SharePoint list there are items you need to delete and the rest items must stay (typical case might be to purge old items – e.g. items created last year).

In this case you’d

  • get all list items (or use query to get some list items)
  • select items that need to be deleted based on your criteria, e.g. created date or last modified date etc.
  • use PnP.PowerShell batches to delete only what you need
# to get all list items
$listItems = Get-PnPListItem -List Tasks -PageSize 1000
# or to get some list items 
$listItems = Get-PnPListItem -List Tasks -Query <query>
# select items to delete
$itemsToDelete = $listItems | ?{$_.Modified -lt $threshold}
# delete some list items
$batch = New-PnPBatch 
$itemsToDelete | Foreach-Object { Remove-PnPListItem -List $list -Identity $_ -Batch $batch } 
Invoke-PnPBatch -Batch $batch

PnP.PowerShell batch vs ScriptBlock

How fast are PnP batches? What is better in terms of performance – ScriptBlock or Batching? Here are my measurements:

Time elapsed, secondswith batcheswith scriptBlockwithout batches
Add-PnPListItem (100 items)6-10 seconds60-120 seconds
Add-PnPListItem (500 items)20-40 seconds230-600 seconds
Add-PnPListItem (7000 items)314-600 seconds
Add-PnPListItem (37000 items)3200 seconds
Remove-PnPListItem (1000 items)58-103 seconds58 seconds430-1060 seconds
Remove-PnPListItem (7000 items)395-990 seconds
3000 seconds
397-980 seconds
Remove-PnPListItem (30000 items)one big batch : 13600 seconds
30 batches 1000 items each: 3500 seconds

both – PnP PowerShell batches and ScriptBlocks are 7-10 times faster than plain PnP PowerShell!

Can we use Microsoft Graph API to complete the same task? TBC…

Note… For the sake of history: It used to be like that for 5k+ lists:
“Remove-PnPList” fails with a message “The attempted operation is prohibited because it exceeds the list view threshold enforced by the administrator”. Deleting with GUI failed too.

References: