WIP: Work In Progress
There are several assertion regarding how an Azure Function App should be configured according to security best practices. Think of each one as a requirement or policy Azure Function App should be compliant with. Azure Function App setup usually includes other Azure services – like Storage account, Key Vault, Networking etc. Some of the requirements contradict others. Blindly following remediation steps might break function app. Let us think of it holistically and propose an ideal Azure Function App configuration.
Highly recommended policies (configurations) are:
Recommended policies (configurations) are:
- Azure function app should use latest HTTP version
- Azure geo-redundant storage should be enabled for storage accounts
- function apps should only be accessible over https
- function apps should have client certificates (incoming client certificates) enabled
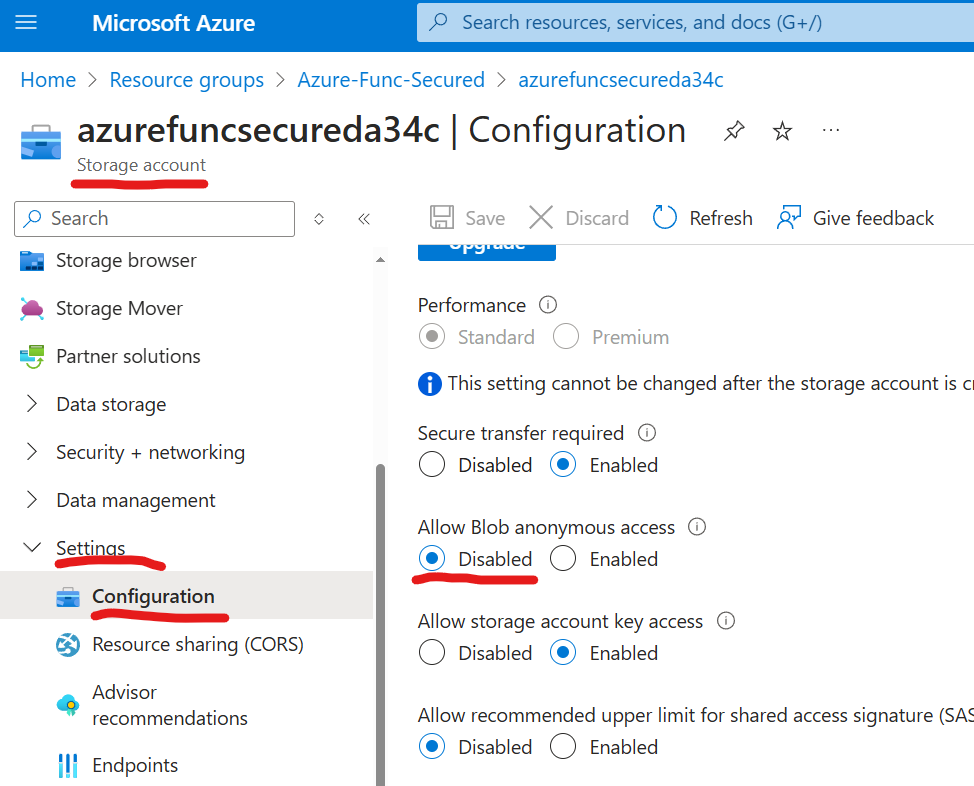
- storage account public access should be disallowed
- versioning for Azure Storage should be enabled
- storage account should use private link
- storage accounts should restrict network access using virtual network rules
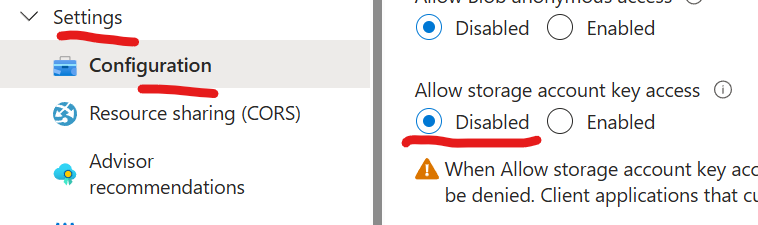
- storage accounts should prevent shared key access
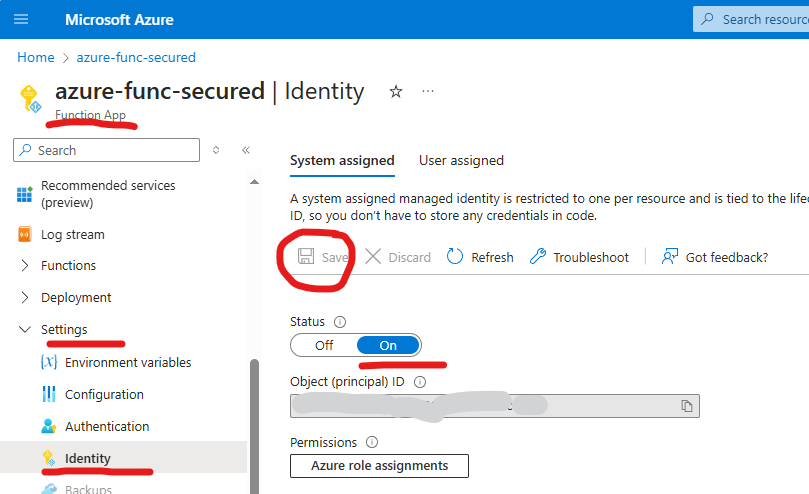
- managed identity should be enabled on function apps
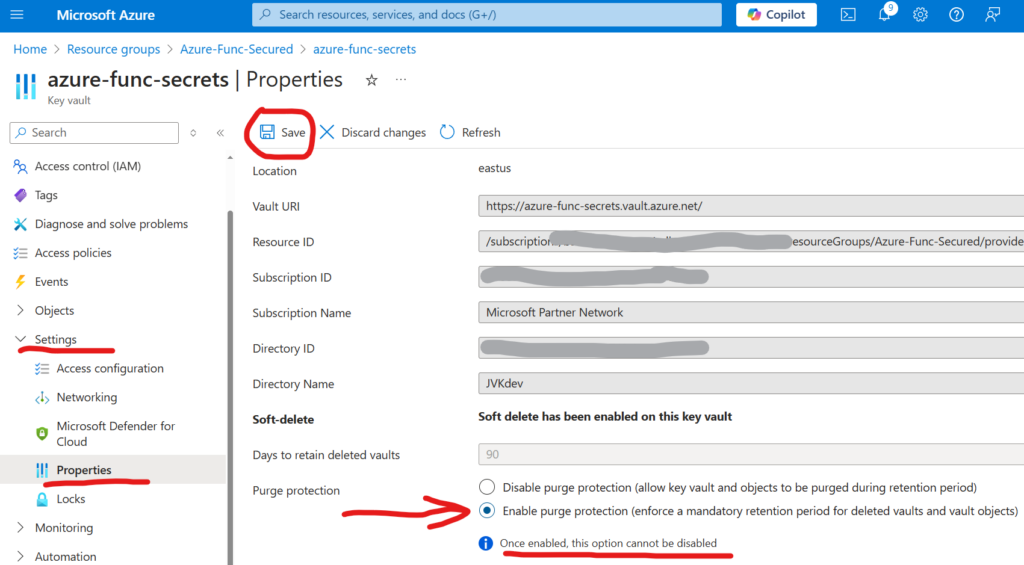
- Azure key vaults should have purge protection enabled
- Azure key vaults should use private link
- Azure key vaults should use RBAC permission model
- Azure app service diagnostics logs should be enabled
- Azure app should use private link
- Azure function app should have authentication enabled
Our ideal Azure Function App configuration.
Step-by-step guide securing Azure Function App
Create an OotB Function App
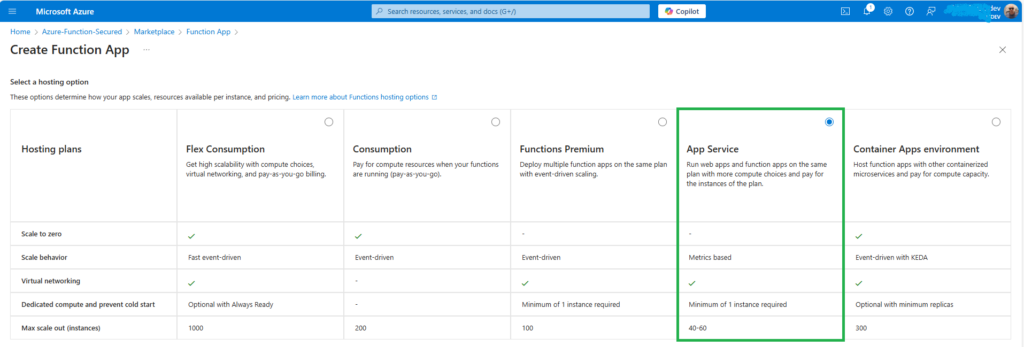
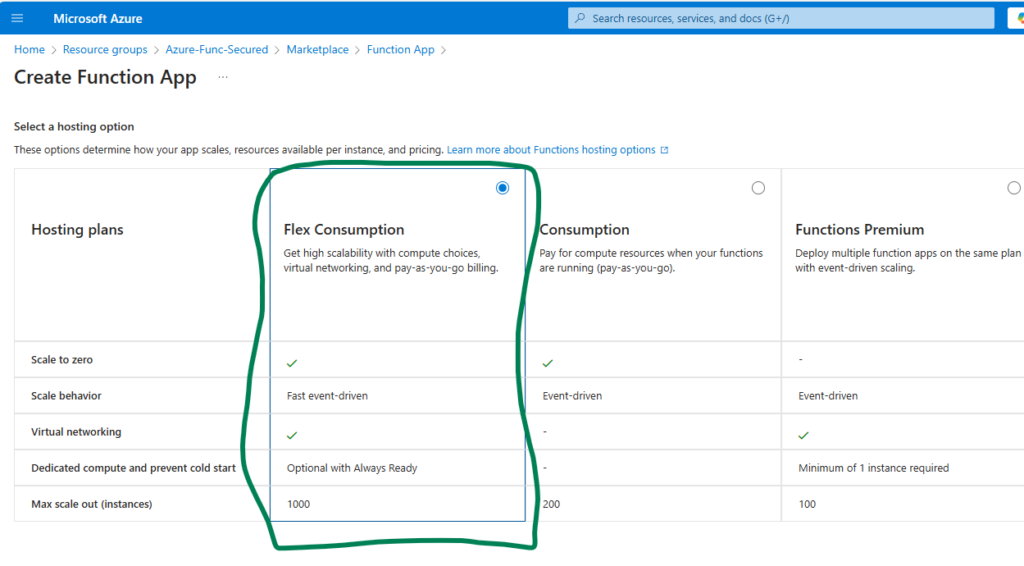
Let us first build a working function app created “as is”, with all settings left by default, so we could apply best practices later. First, we’d need a new resource groups, then we’d create a function with “App Service” (aka Dedicated) hosting plan:
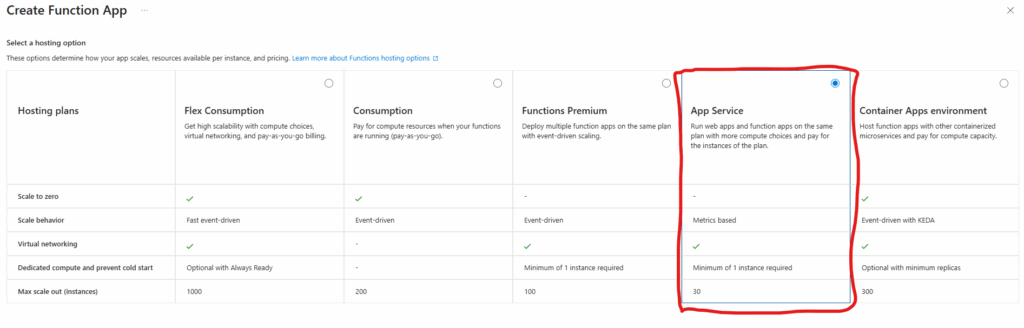
“App Service” (Dedicated) hosting plan is required as it is the only one that will allow us to satisfy all security best practices under Windows. Alternatives might be (tbc) Container or Flex Consumption – both Linux-based.
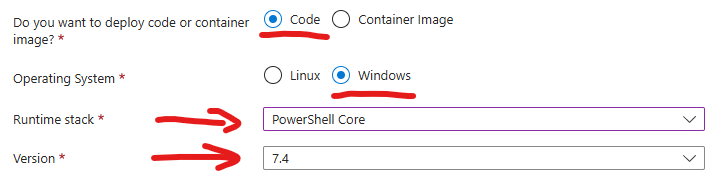
I will use PowerShell – so I have selected Code (not container) under Windows and PowerShell 7.4. runtime stack. All the other settings are by default – new auto-created storage, “Enable public access” – On, “Enable virtual network integration” – Off, new auto-created application insights etc.
You can use whatever runtime stack you are comfortable with – C#, Python etc. As this is what we need to ensure function is working before and after we applied all the security best practices. Actual steps to secure the function app are not depending on runtime stack chosen.
Create a simple Function and deploy it to Function App
We`d need a fully working function that access SharePoint. Ideally, I’d create a key vault and save credentials in the key vault. I’d provide access to the key vault for my function app so my code would pull credentials when needed and access Microsoft 365 (you can refer to “Connect to SharePoint via Graph API from Azure Function App” for the detailed step-by-step process), but since we are going to get rid of key vaults and use Managed Identities – I’ll save app secret in the environment variable for now.
Import modules
So, I created a simple OotB PowerShell timer-triggered function and deployed it to My function app. Then I updated requirements.psd1:
# requirements.psd1
@{
    'PnP.PowerShell' = '3.*'
}
and I updated function code itself (run.ps1)
# run.ps1
param($Timer)
$currentUTCtime = (Get-Date).ToUniversalTime()
if ($Timer.IsPastDue) {
Write-Host "PowerShell timer is running late!"
}
Write-Host "PowerShell timer trigger function ran! TIME: $currentUTCtime"
Write-Host "##############################################"
Write-Host "Check modules installed:"
Import-Module PnP.PowerShell
Get-Module PnP.PowerShell
Write-Host "Check command available:"
Get-Command -Name Connect-PnPOnline -Module PnP.PowerShell | select Version, Name, ModuleName
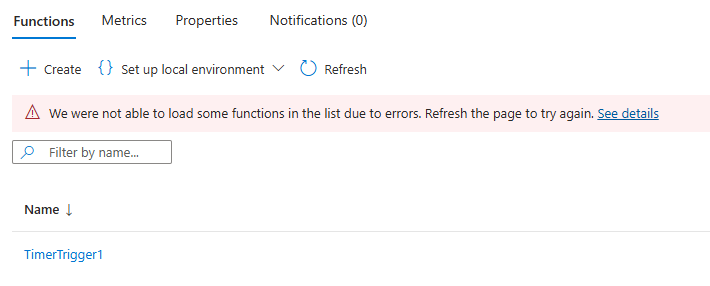
Write-Host "##############################################"Check function invocations, ensure function is running correctly – PnP.PowerShell module is imported and ready to use.
Credentials to access SharePoint
As I mentioned, we will temporary be using environment variables to keep secrets – so we ensure the function does have access to SharePoint. For this we need
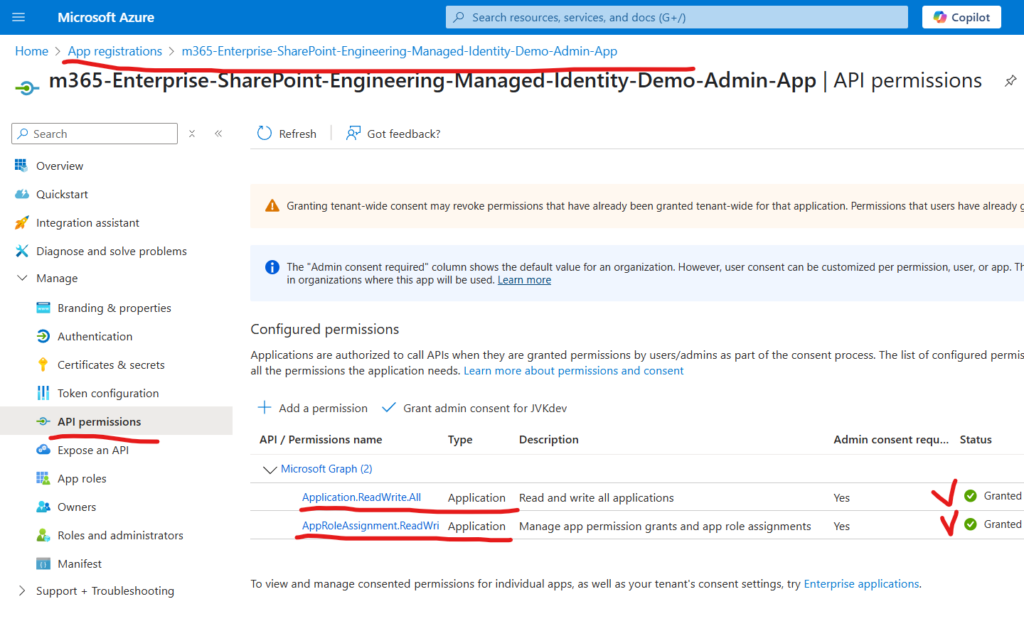
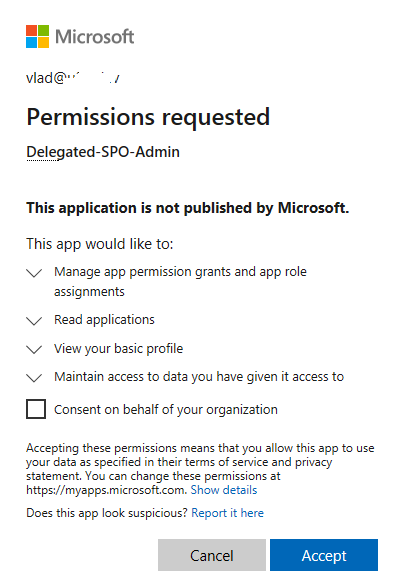
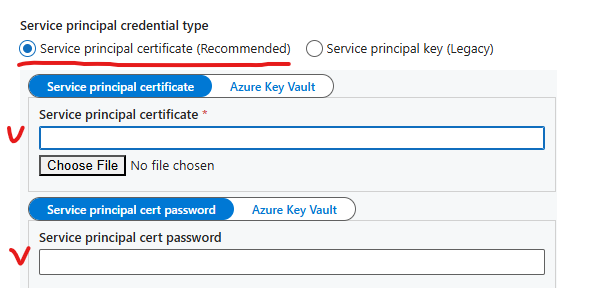
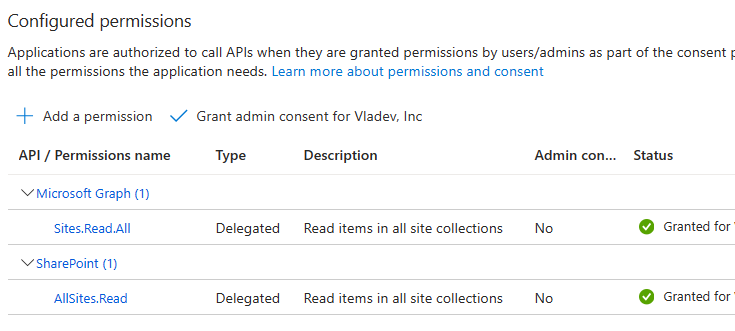
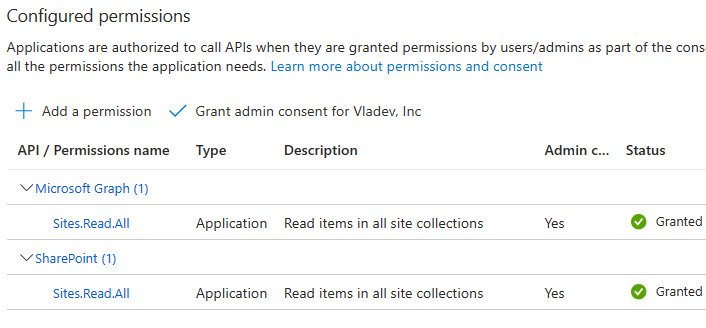
- register a new application under Entra Id and configure it to access SharePoint
here is the guide: “Authentication to Microsoft Graph: Azure Registered Apps Certificates and Secrets“ - put secret in an environment variable
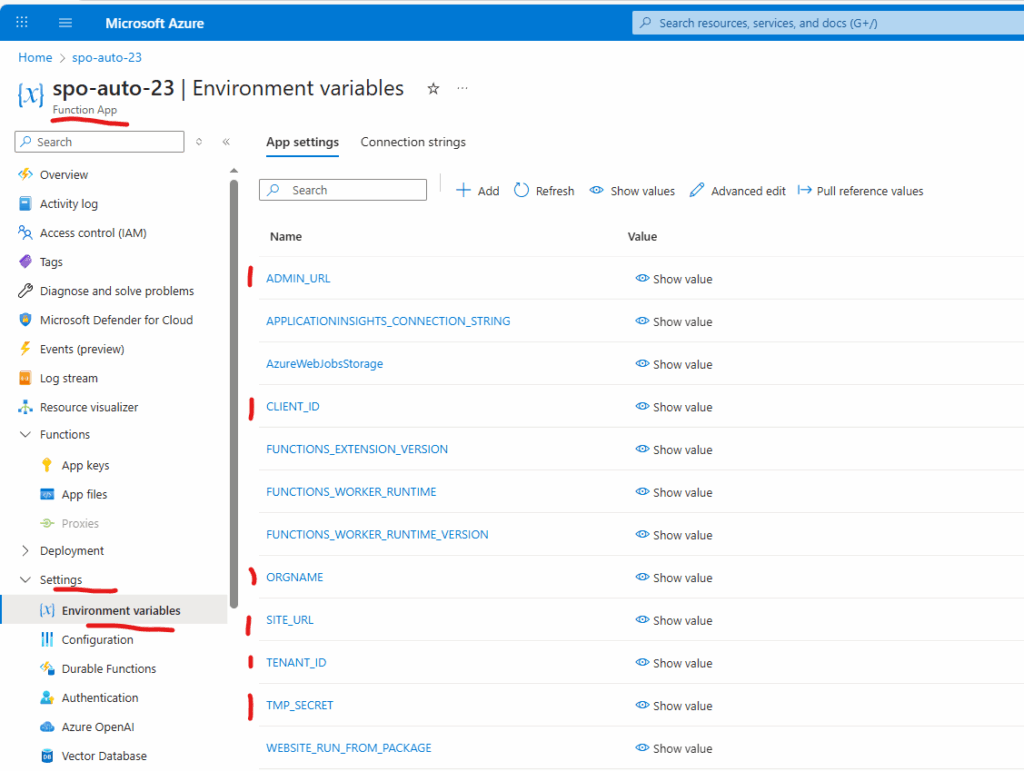
you can use vscode local.settings.json or update environment variables manually under Azure Function App
VSCode local.settings.json:
{
"IsEncrypted": false,
"Values": {
"AzureWebJobsStorage": "",
"FUNCTIONS_WORKER_RUNTIME_VERSION": "7.4",
"FUNCTIONS_WORKER_RUNTIME": "powershell",
"ORGNAME": "contoso",
"TENANT_ID": "your-tenant-id",
"CLIENT_ID": "your-client-id",
"TMP_SECRET": "This is a secret",
"ADMIN_URL": "https://admin.microsoft.com",
"SITE_URL": "https://contoso.sharepoint.com"
}
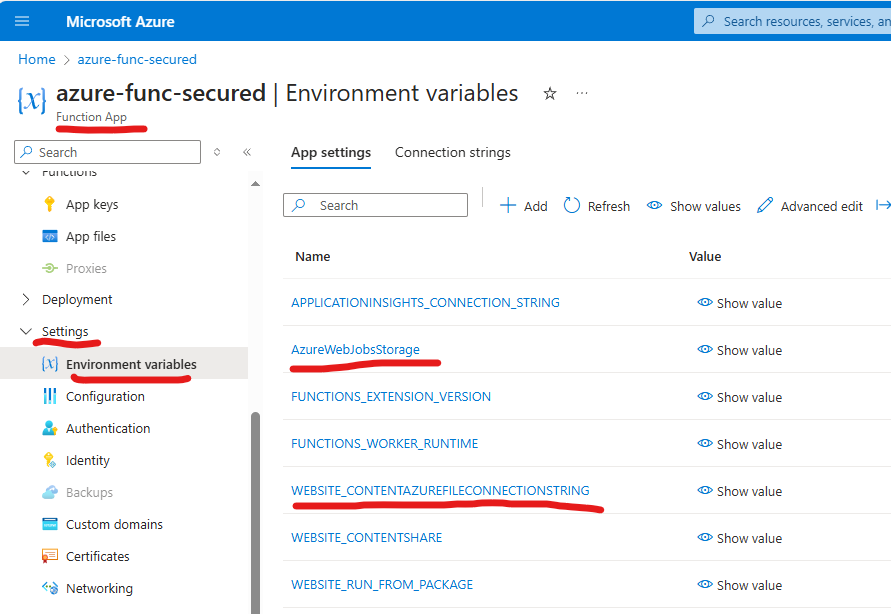
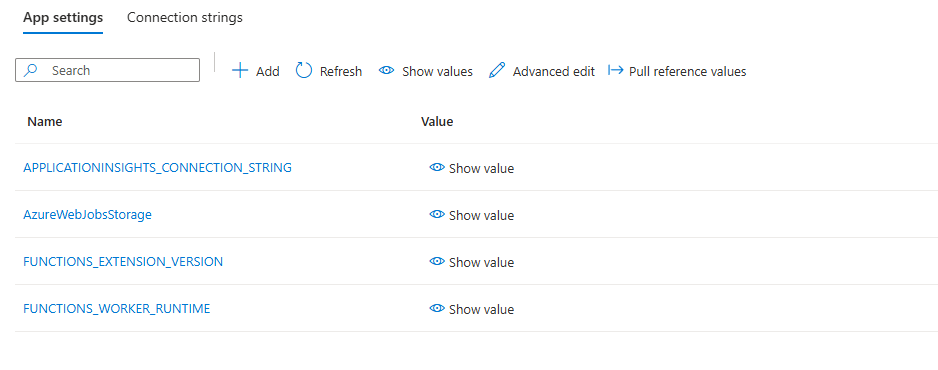
}Finally you should have something like this under environment variables of you Function App:
Access SharePoint from function
Now let us update the function code with actual connections to SharePoint tenant and to Specific site.
I will try to connect to SharePoint via PowerShell module PnP.PowerShell and via plain web-requests calls to Microsoft Graph API.
Add the following (PnP part) to your function code run.ps1:
$orgName = $env:ORGNAME
$tenantId = $env:TENANT_ID
$clientID = $env:CLIENT_ID
$clientSc = $env:TMP_SECRET
$adminUrl = $env:ADMIN_URL
$siteUrl = $env:SITE_URL

#############################################################################################
Write-Host "Let us connect to SharePoint via PnP:"
$connectionToTenant = Connect-PnPOnline -Url $adminUrl -ClientId $clientID -ClientSecret $clientSc -ReturnConnection
Write-Host "Connected to admin site:" $connectionToTenant.Url
$tenantSite = Get-PnPTenantSite -Url $siteUrl -Connection $connectionToTenant
Write-Host "Tenant site title:" $tenantSite.Title
$connectionToSite = Connect-PnPOnline -Url $siteUrl -ClientId $clientID -ClientSecret $clientSc -ReturnConnection
Write-Host "Connected to regular site:" $connectionToSite.Url
$site = Get-PnPSite -Connection $connectionToSite
Write-Host "Site title:" $site.Title
The the direct calls to MS Graph API:
#############################################################################################
Write-Host "##############################################"
Write-Host "Let us get token to connect to Microsoft Graph:"
# Construct URI and body needed for authentication
$uri = "https://login.microsoftonline.com/$tenantId/oauth2/v2.0/token"
$body = @{
    client_id     = $clientid
    scope         = "https://graph.microsoft.com/.default"
    client_secret = $clientSc
    grant_type    = "client_credentials"
}
$tokenRequest = Invoke-WebRequest -Method Post -Uri $uri -ContentType "application/x-www-form-urlencoded" -Body $body -UseBasicParsing
Write-Host "Token request status:" $tokenRequest.StatusDescription
$token = ($tokenRequest.Content | ConvertFrom-Json).access_token
$headers = @{Authorization = "Bearer $token" }

Write-Host "Let us connect to SharePoint via Microsoft Graph:"
$apiUrl = "https://graph.microsoft.com/v1.0/sites/$orgname.sharepoint.com"
$rootSite = Invoke-RestMethod -Headers $Headers -Uri $apiUrl -Method Get
Write-Host "Root site Url:" $rootSite.WebUrl
Write-Host "Root site display name:" $rootSite.displayName
#############################################################################################
Check function invocations, ensure function is working good getting SharePoint site via Microsoft Graph, but failing trying to get SharePoint site via PnP. The reason is PnP use SharePoint API under the hood, and calling SharePoint API require authentication with a certificate (but we have a secret here), though it’s OK to call Microsoft Graph API being authenticated with secret.
We will solve the SharePoint API secret/certificate problem below. Now it’s time to secure function according to the best practices.
Securing Azure Function App
Azure key vaults should have firewall enabled
If you are using key vaults to keep secrets or certificates – it is highly recommended to enable and configure the key vault firewall, so your secrets will not be accessible to any public IPs, but to only selected IP addresses/services. More details: Microsoft Network security for Azure Key Vault
Alternatively you can use environment variables for secrets (considered as valid option, but less secure).
Another option (considered as more secure) is to use managed identities (system-assigned or user-assigned). This option works if your workload is fully hosted by Microsoft – in Azure or Microsoft 365.
More details on using MI:
– Connecting Azure Function to Microsoft 365 with Managed Identity
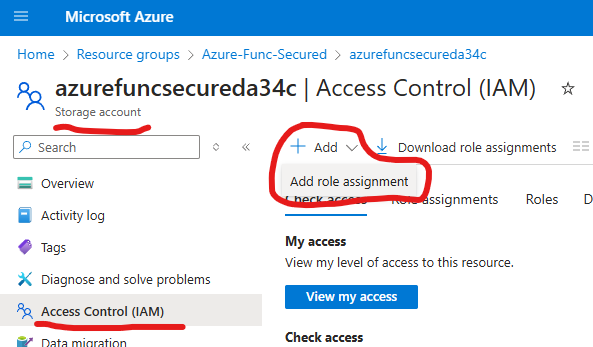
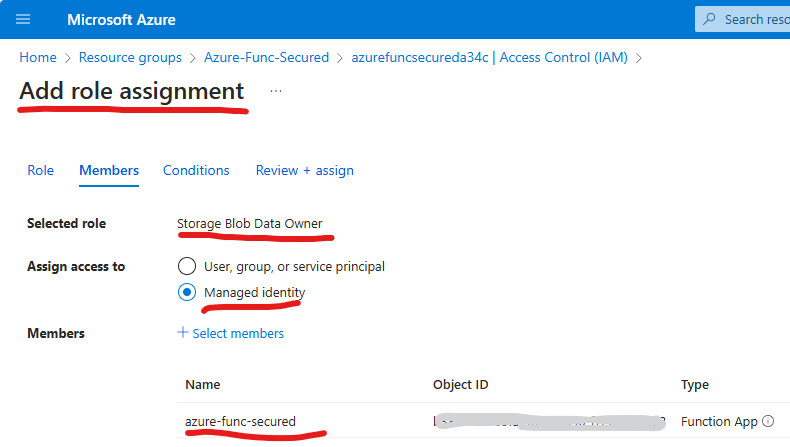
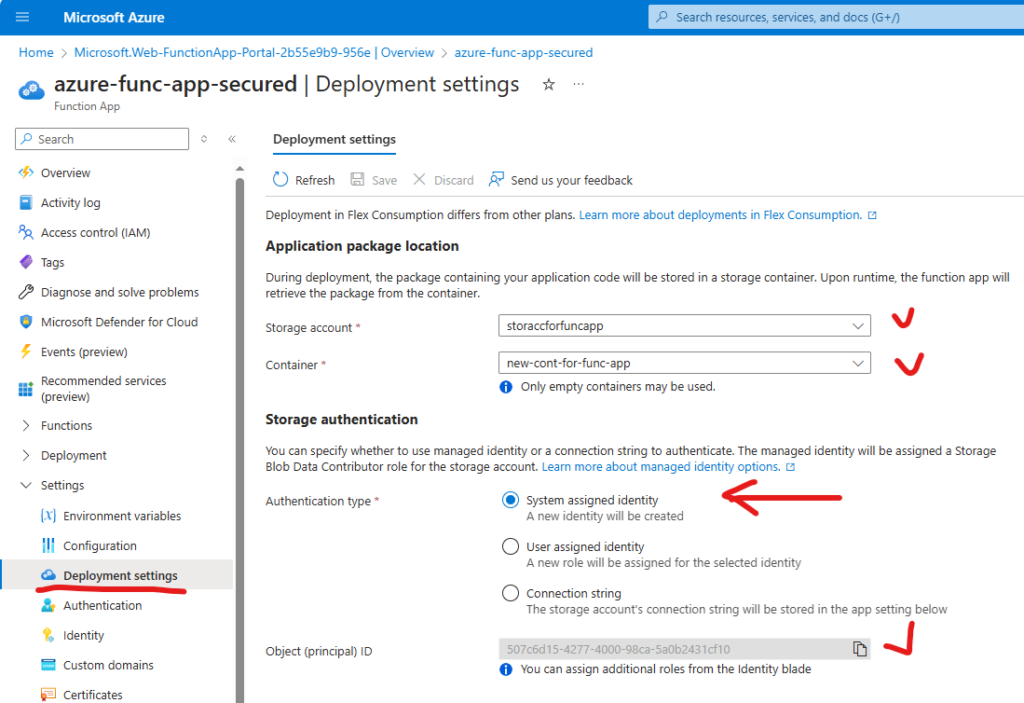
– Securing Storage Account in Azure Function
– Azure Function Storage accessed with Microsoft Entra Id Managed Identity
Azure network peering restrict to same subscription
It is highly recommended to prevent the creation of vNet peerings outside of the same subscription.
Check Microsoft Azure virtual network peering for details.
TBC