Category Archives: Microsoft 365

Connect-PnPOnline with a certificate stored in Azure Key Vault

Scenario

You run some PnP PowerShell code unattended e.g. daemon/service app, background job – under application permissions – with no user interaction.
Your app needs to connect to SharePoint and/or Microsoft Graph API. Your organization require authentication with a certificate (no secrets). You want certificate stored securely in Azure Key Vault.

Solution (Step-by-step process)

  1. Obtain a certificate (create a self-signed or request trusted)
  2. In Azure where you have Microsoft 365 SharePoint tenant
    1. Create a new Registered App in Azure; save App (client) id, Directory (Tenant) Id
    2. Configure App: add MS Graph and SharePoint API application (not delegated) permissions
    3. Upload the certificate to the app under “Certificates & secrets”
  3. In Azure where you have paid subscription (could be same or different)
    1. Create an Azure Key Vault
    2. Upload certificate to the Key Vault manually (with GUI)
  4. While you develop/debug your custom daemon application at your local machine
    1. Provide permissions to the Key Vault for your personal account
    2. Connect to Azure (the one where your Key Vault is) running Connect-AzAccount
      – so your app can get a Certificate to authenticate to SharePoint Online
  5. For your application deployed to Azure (e.g. Azure Function App )
    1. Turn On managed identity (Your Function App -> Identity -> Status:On) and Save; notice an Object (Principal) Id just created
    2. Provide for your managed identity principal Id permissions to the Key Vault, so when your daemon app is running in the cloud – it could go to the key Vault and retrieve Certificate

Here is the sample PowerShell code to get certificate from Azure Key Vault and Connect to SharePoint with PnP (Connect-PnPOnline):

# ensure you use PowerShell 7
$PSVersionTable

# connect to your Azure subscription
Connect-AzAccount -Subscription "<subscription id>" -Tenant "<tenant id>"
Get-AzSubscription | fl
Get-AzContext

# Specify Key Vault Name and Certificate Name
$VaultName = "<azure key vault name>"
$certName = "certificate name as it stored in key vault"

# Get certificate stored in KeyVault (Yes, get it as SECRET)
$secret = Get-AzKeyVaultSecret -VaultName $vaultName -Name $certName
$secretValueText = ($secret.SecretValue | ConvertFrom-SecureString -AsPlainText )

# connect to PnP
$tenant = "contoso.onmicrosoft.com" # or tenant Id
$siteUrl = "https://contoso.sharepoint.com"
$clientID = "<App (client) Id>" # Azure Registered App with the same certificate and API permissions configured
Connect-PnPOnline -Url $siteUrl -ClientId $clientID -Tenant $tenant -CertificateBase64Encoded $secretValueText

Get-PnPSite

The same PowerShell code in GitHub: Connect-PnPOnline-with-certificate.ps1

References:

Yammer API with PowerShell: Private groups and messages

Update: Private content mode will stop working on June 30, 2025.
Microsoft announced Private content mode retirement in Microsoft Viva Engage (Yammer).
Message ID MC1045211.

As an Office 365 administrator, I would like to get some reports on Yammer with PowerShell. How it’s done?

Patrick Lamber wrote a good article here: “Access the Yammer REST API through PowerShell“. The only I would add (important!) is:

By default, even with a Verified Admin token, you do not have access to private messages and private groups content.
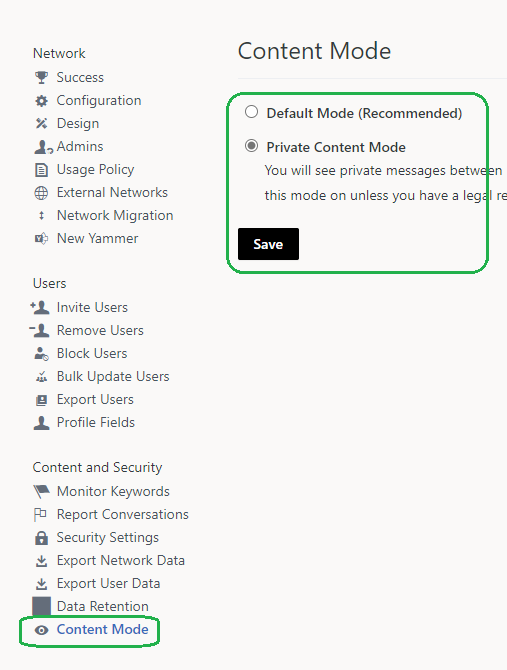
To get private stuff, you need select “Private Content Mode” under Yammer Admin Center -> Content and Security -> Content Mode:

Check Microsoft: “Monitor private content in Yammer” and
Yammer: “Verified Admin Private Content Mode

If you do not have “Private Content Mode” set up, you might see some weird “Invoke-WebRequest” errors like:

PnP.PowerShell Batches and PowerShell 7 Parallel

Parallelism

Can I use PowerShell 7 “-Parallel” option against SharePoint list items with PnP.PowerShell? Can I run something like:

$items | ForEach-Object -Parallel {
    $listItem = Set-PnPListItem -List "LargeList" -Identity $_ -Values @{"Number" = $(Get-Random -Minimum 100 -Maximum 200 ) }
} 

Yes, sure… But! Since it’s a cloud operation against Microsoft 365 – you will be throttled if you start more than 2 parallel threads! Using just 2 threads does not provide significant performance improvements.

Batching

So, try PnP.PowerShell batches instead. When you use batching, number of requests to the server are much lower. Consider something like:

$batch = New-PnPBatch
1..100 | ForEach-Object{ Add-PnPListItem -List "ItemTest" -Values @{"Title"="Test Item Batched $_"} -Batch $batch }
Invoke-PnPBatch -Batch $batch


Measurements

Adding and setting 100 items with “Add-PnPListItem” and “Set-PnPListItem” in a large (more than 5000 items ) SharePoint list measurements:

Add-PnPListItem
Time per item, seconds
Set-PnPListItem
Time per item, seconds
Regular, without batching1.261.55
Using batches (New-PnPBatch)0.100.80
Using “Parallel” option, with ThrottleLimit 20.690.79
Using “Parallel” option, with ThrottleLimit 30.44 (fails level: ~4/100) 0.53 (fails level: ~3/100)

Adding items with PnP.PowerShell batching is much faster than without batching.

More:

How to delete a large SPO list or all/some items in a large SPO list

Scenario: You have a large (>5k items) list in SharePoint Online you need to clean-up, for instance:

  • You need to delete the entire list
  • You need to delete all the list items, but keep the list
  • You need to delete some of list items, but keep the others

Deleting a large SharePoint Online list

There was a problem in SharePoint Online – you could not delete a large list – you had to remove all items first, but removing all items was also a challenge. Microsoft improved SharePoint Online, so now it takes ~1 second to delete any SharePoint list, including 5000+ items list via GUI or PowerShell:

Remove-PnPList -Identity $list

command works very fast – ~1 second to delete entire list with >5000 items.

Delete all items in a large SharePoint Online list

In this scenario we need to keep the list, but make it empty (clean it up).

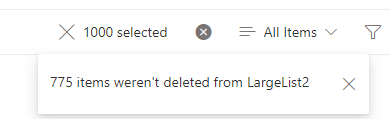
GUI: You can change the list view settings “Item Limit” to <5000 and try to delete items in chunks, but (at least in my experience) when you try to select, let say, 1000 items and delete them via GUI – it says “775 items were not deleted from large list”:

so this option seems like not a good one.

ShareGate: 3-rd party tools like Sharegate, SysKit give a good results too.

PowerShell

Try this PowerShell command with ScriptBlock:

Get-PnPListItem -List $list -Fields "ID" -PageSize 100 -ScriptBlock { Param($items) $items | Sort-Object -Property Id -Descending | ForEach-Object{ $_.DeleteObject() } } 

or this PowerShell with batches:

$batch = New-PnPBatch
1..12000 | Foreach-Object { Remove-PnPListItem -List $list -Identity $_ -Batch $batch }
Invoke-PnPBatch -Batch $batch

for me both methods gave same good result: ~17 items per second ( ~7 times faster than regular).

Deleting some items from a large SPO list

Consider the following scenario: in a large SharePoint list there are items you need to delete and the rest items must stay (typical case might be to purge old items – e.g. items created last year).

In this case you’d

  • get all list items (or use query to get some list items)
  • select items that need to be deleted based on your criteria, e.g. created date or last modified date etc.
  • use PnP.PowerShell batches to delete only what you need
# to get all list items
$listItems = Get-PnPListItem -List Tasks -PageSize 1000
# or to get some list items 
$listItems = Get-PnPListItem -List Tasks -Query <query>
# select items to delete
$itemsToDelete = $listItems | ?{$_.Modified -lt $threshold}
# delete some list items
$batch = New-PnPBatch 
$itemsToDelete | Foreach-Object { Remove-PnPListItem -List $list -Identity $_ -Batch $batch } 
Invoke-PnPBatch -Batch $batch

PnP.PowerShell batch vs ScriptBlock

How fast are PnP batches? What is better in terms of performance – ScriptBlock or Batching? Here are my measurements:

Time elapsed, secondswith batcheswith scriptBlockwithout batches
Add-PnPListItem (100 items)6-10 seconds60-120 seconds
Add-PnPListItem (500 items)20-40 seconds230-600 seconds
Add-PnPListItem (7000 items)314-600 seconds
Add-PnPListItem (37000 items)3200 seconds
Remove-PnPListItem (1000 items)58-103 seconds58 seconds430-1060 seconds
Remove-PnPListItem (7000 items)395-990 seconds
3000 seconds
397-980 seconds
Remove-PnPListItem (30000 items)one big batch : 13600 seconds
30 batches 1000 items each: 3500 seconds

both – PnP PowerShell batches and ScriptBlocks are 7-10 times faster than plain PnP PowerShell!

Can we use Microsoft Graph API to complete the same task? TBC…

Note… For the sake of history: It used to be like that for 5k+ lists:
“Remove-PnPList” fails with a message “The attempted operation is prohibited because it exceeds the list view threshold enforced by the administrator”. Deleting with GUI failed too.

References:

Office 365 retention labels and policies for SharePoint

As I am a SharePoint person, and retention policies and labels are not a SharePoint engineer responsibility, I do not go to the m365 Compliance Center frequently. Below are My notes for myself on key moments – how to create and configure Office 365 retention labels and Policies at Compliance Center and use labels in SharePoint Online (SPO).

In SPO at each site collection level you can still work with retention policies the old way – create policies under Site Collection Settings – Content Type Policy – and apply policies at library level under Library Settings/Information Management Policy Settings. There is also Site Retention Policy.

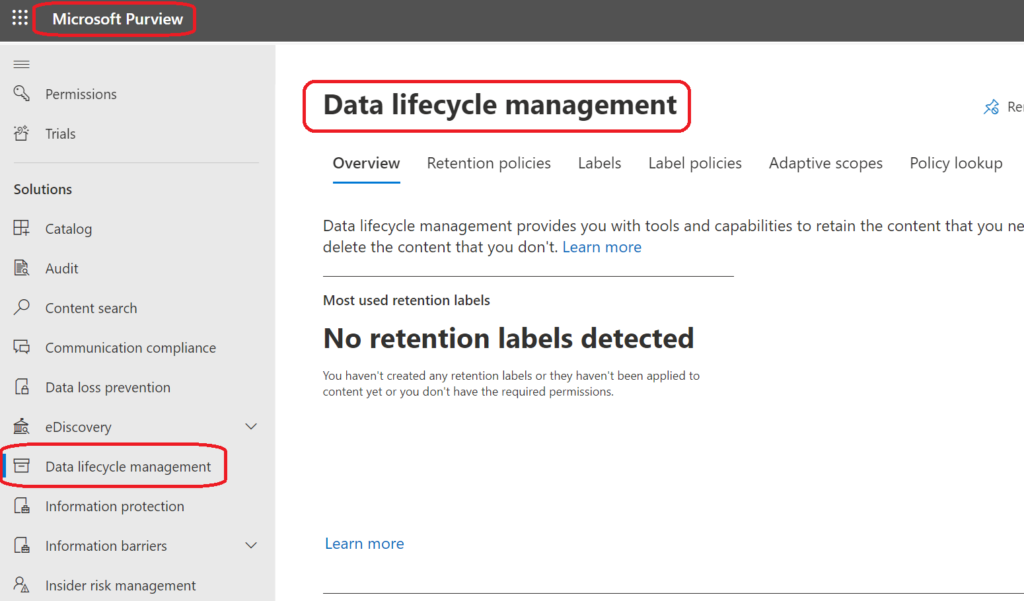
But Microsoft is making efforts to centralize and unify such things – so you can specify retention policies in one place and apply them across all Office 365 content (not only SharePoint). That place was called Office 365 Security and Compliance Center (SCC). Later Microsoft separated Security Center and Compliance Center. So currently Retention Policies are under “Microsoft Purview” (former Microsoft Compliance Center) -> Solutions -> “Data lifecycle management”:

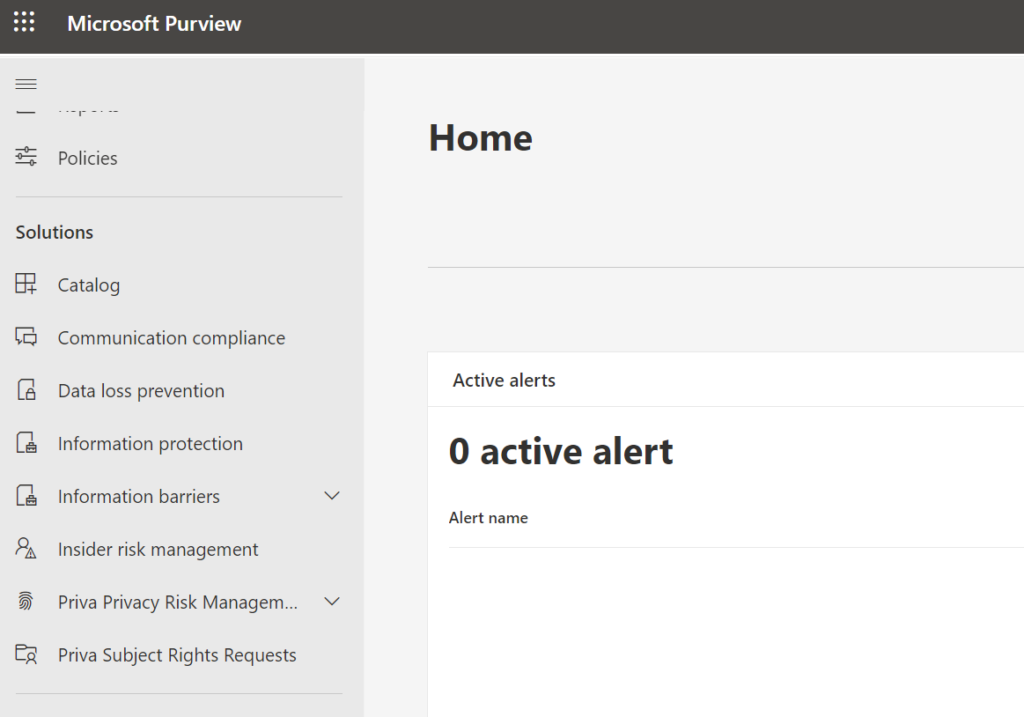
To get access to “Data lifecycle management” solution – you need to have a “” or “” roles. SharePoint or Teams administrator cannot access Purview. Even having “Global reader” or “Security reader” an admin will not be able to see “Data lifecycle management” blade. Here is how Microsoft Purview looks like for a Global reader:

Although SharePoint admins usually do not have access to SCC and do not go to Site content, we still need to know how it all works. And labels are recommended way to specify retention in SharePoint, so here we are.

Labels are applied to documents, documents are kept in libraries, and at each library you can “Apply a label to items in this library”.

Create Labels

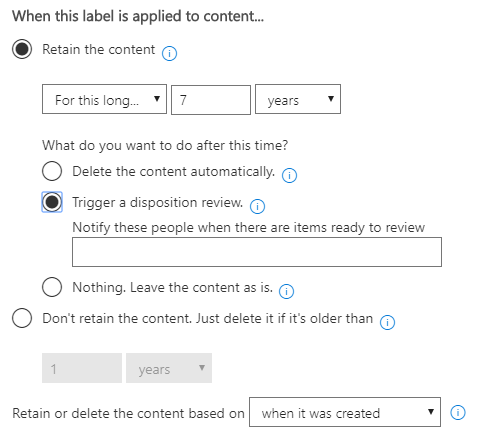
Labels are created in SCC under Classification. The main part looks familiar to SharePoint people:

Label Settings

You can

  • Retain Content forever or for a specified number of days/months/years and then
    – delete it or trigger a disposition review or do nothing
  • Delete content if it’s older than specified number of days/months/years

after it was created/modified/labelled

Apply labels

Now you need to publish created labels – and that is how you create a policy. I.e. policies are where you specify which labels to which content (Exchange, OneDrive, SharePoint, Office 365 groups)

You can also auto-apply labels based on conditions, like

  • content that contains sensitive info
  • content that contains specific words or phrases, or properties
  • content that matches a trainable classifier

but as per Microsoft, “It will take up to 7 days to automatically apply the label to all items that match your conditions.”

Note: “trainable classifier” means an AI ML will be used, and as per Microsoft “Creating machine learning rules requires an Office 365 E5 subscription for your organization”

SharePoint admin center

You can do nothing with labels at SharePoint admin center. Labels are created, published and auto-applied at SCC. At each site collection levels site administrators can apply labels.

SharePoint site

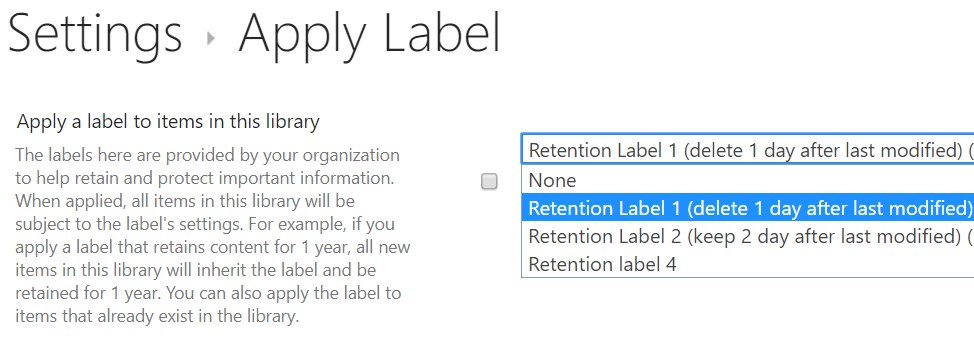
At site collection settings you can still see “Content Type Policy Templates” and “Site Policy”, but that is not the case. Labels are applied at library level under Library Settings/Apply label to items in this list or library.

where you can select a label to apply for all new items in the library. With

You can also apply the label to items that already exist in the library.

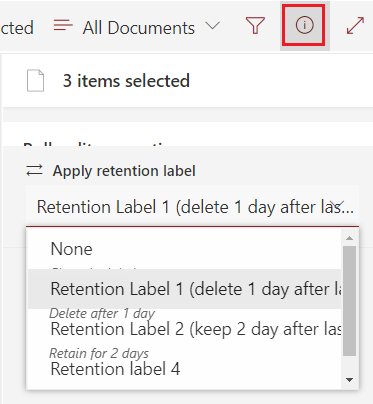
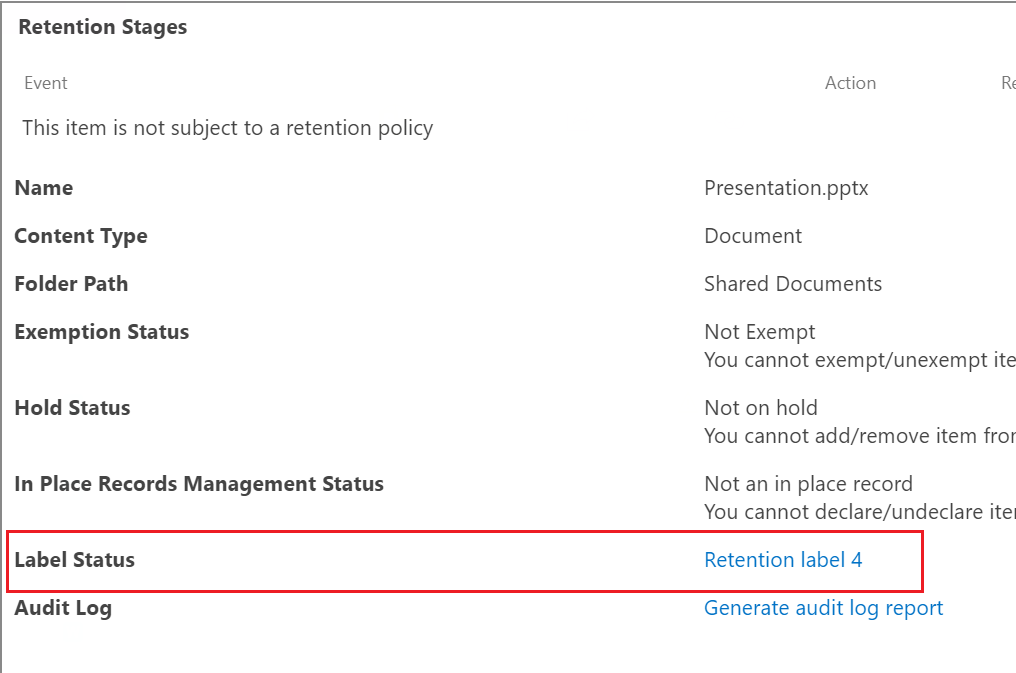
You can also apply (change) label for each single item or multiple selected items under Details pop-up page:

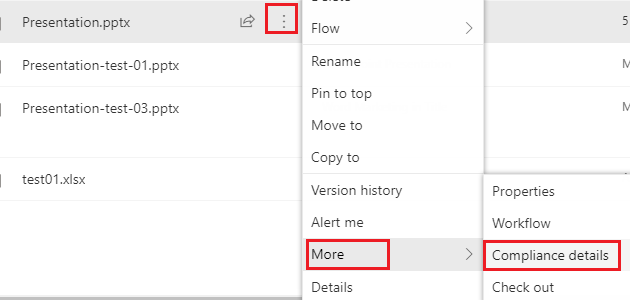
or from under Contect Menu/More/Compliance details:

Adaptive retention policies and scopes

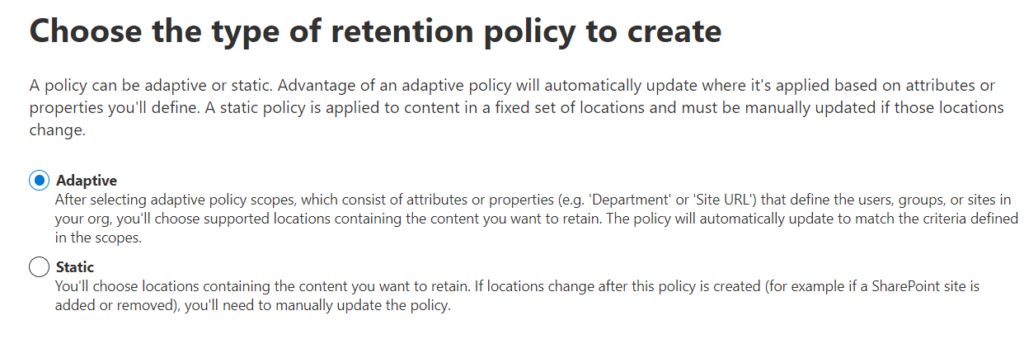
Microsoft recently implemented “Adaptive” retention policies. At step 2 of “Create retention policy” you’ll be asked “Choose the type of retention policy to create”: “A policy can be adaptive or static. Advantage of an adaptive policy will automatically update where it’s applied based on attributes or properties you’ll define. A static policy is applied to content in a fixed set of locations and must be manually updated if those locations change.”

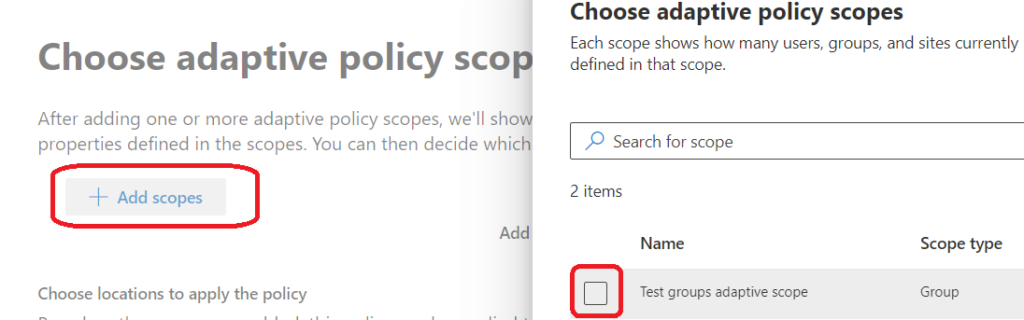
And if you selected “Adaptive” – on the next step you will need to provide the adaptive scope (so at this moment you should already have created your adaptive scopes):

So, let us create your adaptive scopes.
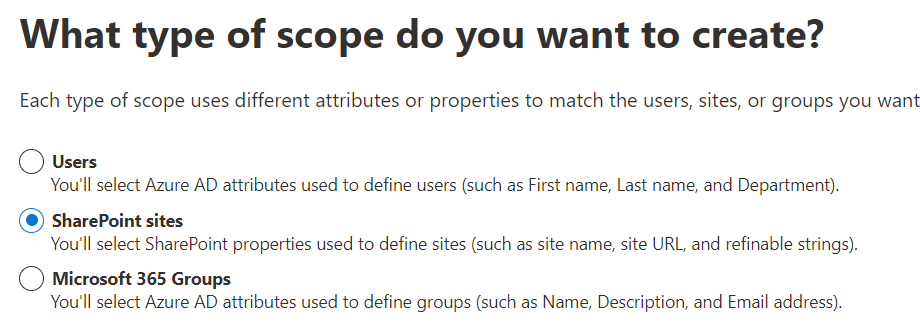
What type of scope do you want to create? SharePoint sites…

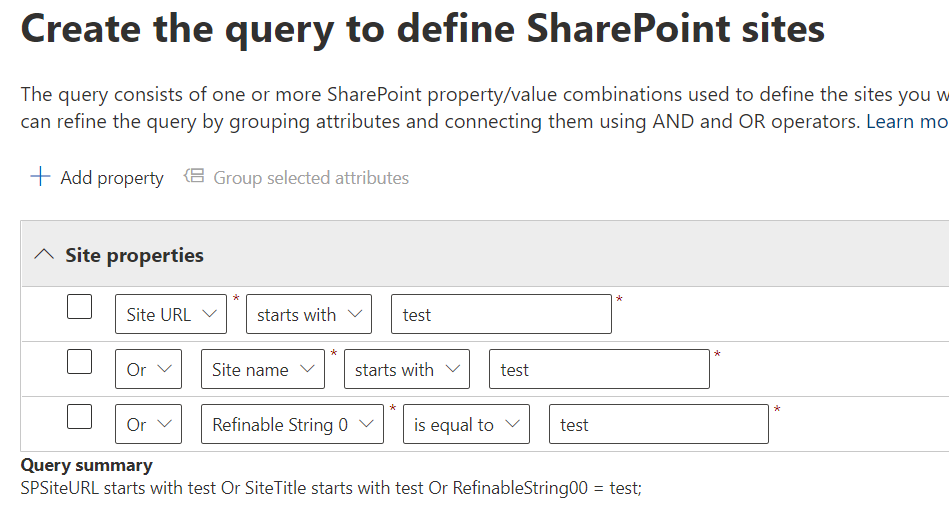
And then you’ll have nothing more then set of conditions:

where you can use objects: “Site Url”, “Site Name” and “Refinable String 0″..”Refinable String 99”. Conditions would be “is equal to”, “is not equal to”, “starts with” and “not starts with”. Or you can select “Advanced query builder” and enter LQL query.

What is the takeaway from this for SharePoint administrators? We would be asked to configure SharePoint the way compliance/retention people can use Refinable Strings.


How do users know – what files are going to be deleted

It would be a good idea to let users know, that their files will be deleted, but the next question would be “can I get a list of files that are scheduled to deletion”?

Surely it is possible for admins to go through site content and find files that were modified last time earlier than a specific date, but there is another method – you can recommend your users to search through their site using

See details in “How to figure out – which files are expiring due to age and going to be deleted as result of retention policy.”


References