Your org is implementing retention policy, which is configured to automatically delete SharePoint content after N years have passed since the last modified date. How do you see what content is going to be deleted? Below I’m sharing how to find old content in SharePoint, Teams or OneDrive site. Specifically, files or documents that are older than a specific date.
Search in SharePoint with GUI
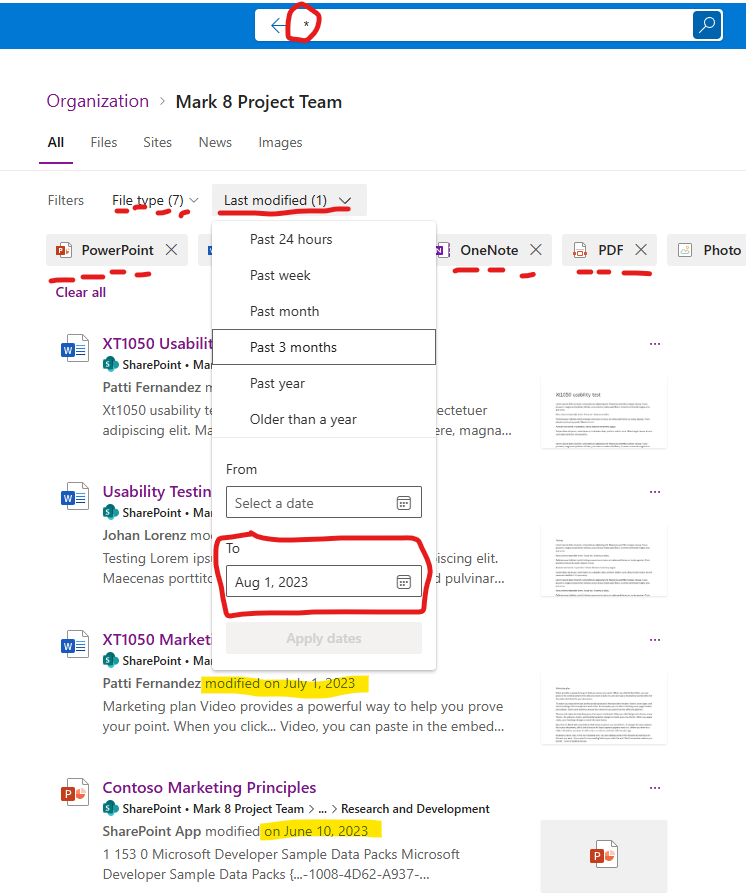
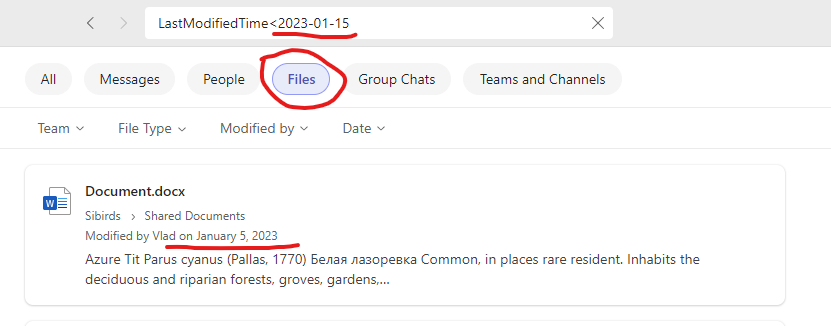
Microsoft did a good job and recently implemented filtering search results by custom date on SharePoint sites. So what you would do is to use * – an asterisk – star-shaped symbol to search for everything, then (optionally) select file type (e.g. Word, Excel) and set “Last modified” date (no From date specified). That will give you all documents modified earlier than your cut-off date:
Or you can use query in the search box as below.
Search in SharePoint with query parameters
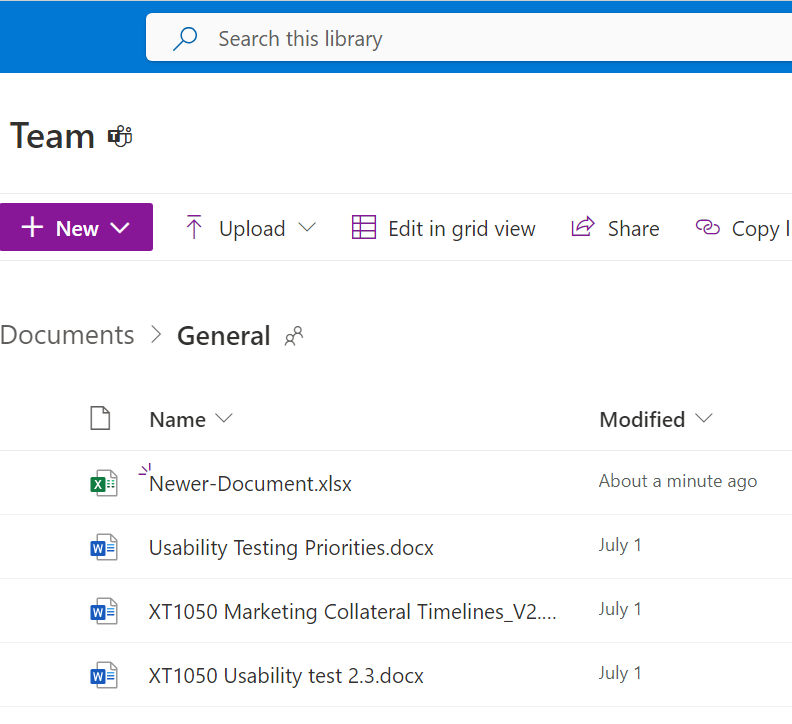
At any level of your site hierarchy – root level, library, folder etc. – you can refine your search results specifying properties values, e.g. document author or document created date or document last modified date. For last modified date the property is “LastModifiedTime” or “LastModifiedTimeForRetention”, e.g. here I’m in the SharePoint site document library:
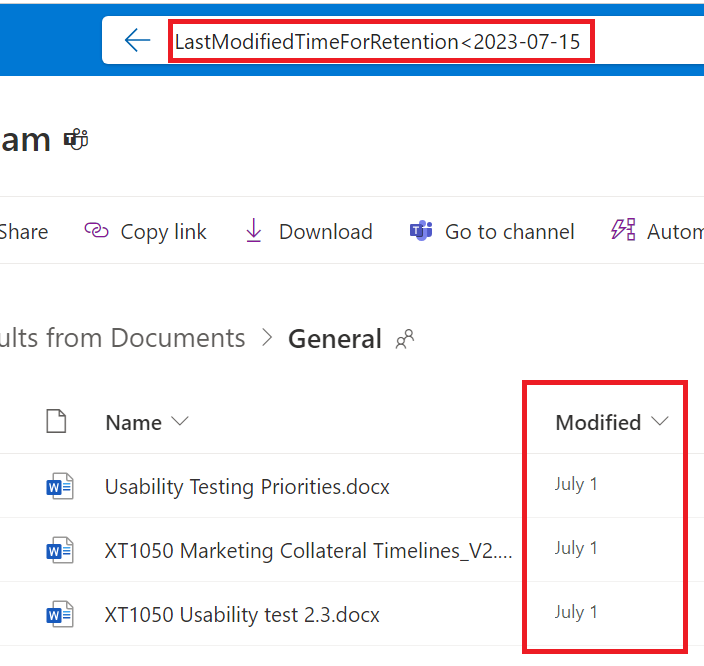
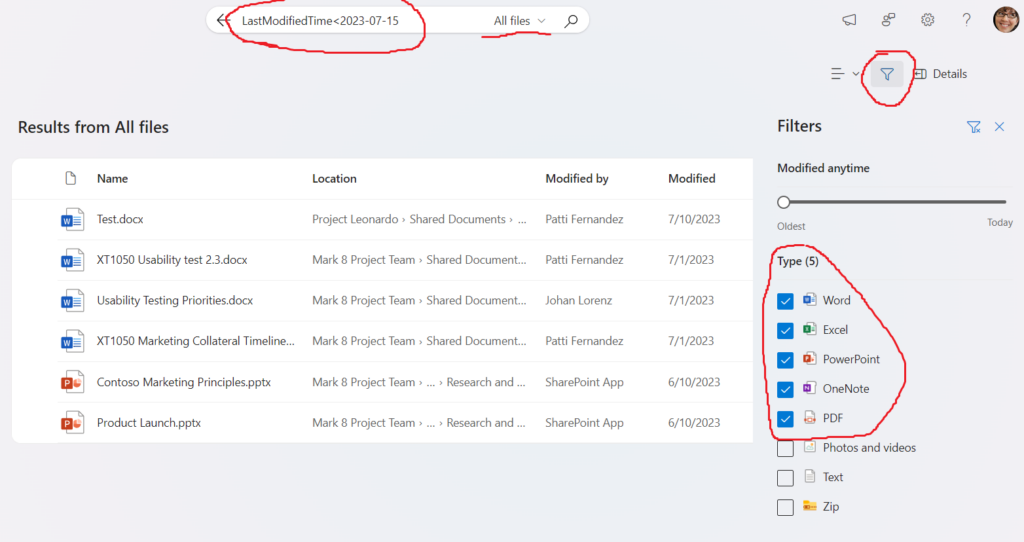
If I put in search box query “LastModifiedTimeForRetention<2023-07-15” I’ll get only documents older than July 15 2023:
There is property “LastModifiedTime”, and there is also property “LastModifiedTimeForRetention” you can use to detect documents your retention policy works against.
When you issue query with just “LastModifiedTimeForRetention<2023-06-15” you get as results all kind of SharePoint content – including pages, libraries, folders etc. If your concern is to avoid specific documents deletion as a result of retention policy – you’d probably be interested in finding documents only and do not want folders (as retention policy applies to all files in all document libraries), e.g.
- If you need only Microsoft Word documents older than some specific date (e.g. June 15, 2021), you might use query: “*.docx LastModifiedTimeForRetention<2021-06-15”
- For Microsoft Word and Excel documents older than June 15, 2021 – you’ might ‘d use query: “(*.docx OR *.xlsx) LastModifiedTimeForRetention<2021-06-15”
If you need only Microsoft Word documents authored by some specific User and older than some specific date, you might use query:
“*.docx author:Patti LastModifiedTimeForRetention<2021-01-01”
Search in Teams
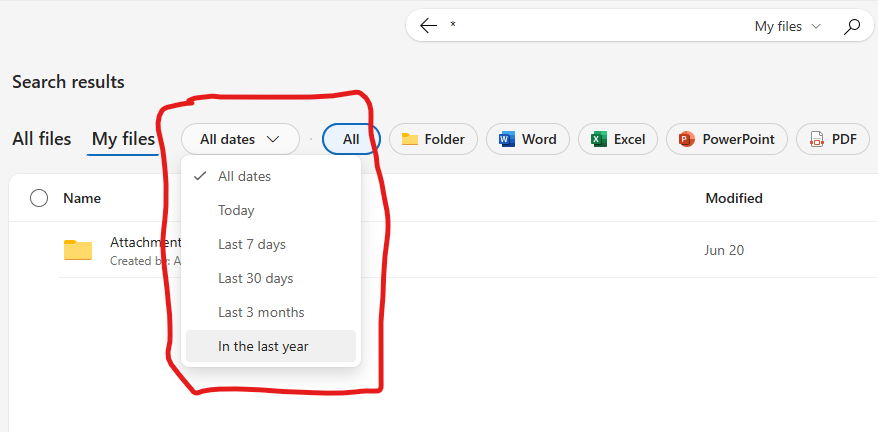
Same as in SharePoint, you can use GUI and select Files tab, then (optionally) type of file you are interested in and Date From and Date To (you have to use both):
Or for better experience you can use refinements to search for the same in Teams. So you’d select “Files” tab and “LastModifiedTime” or “LastModifiedTimeForRetention”:
Microsoft is constantly updating this product, so your experience might be different. Note also that when you search in teams – you search through all sites you have access to.
Search for old documents in OneDrive
Unfortunately, there is no GUI with custom range of dates under OneDrive:
So in OneDrive we have to use search query refiners – putting “LastModifiedTime<2023-07-15” in search bar in OneDrive. In some ways it’s even better, as you can
- search for files in all sites (not only your personal OD site)
- select multiple file types you are interested in
Restore deleted content
Where I can find my deleted content?
To restore deleted contend – go to Recycle Bin of your site or OneDrive. From here you can restore files.
What if I restore content – would it be deleted again?
If content was deleted by Microsoft 365 retention policy – yes, it will be deleted again.
How do I protect my old content from being deleted?
If you want to exclude your content from scheduled deletion – open it, make minor changes and save it, so the last modified date would be updated. If you cannot or should not update content (e.g. picures or pdf files) – you can update document’s metadata.
Search programmatically with Graph API
The same query you can use to search content with Microsoft Graph API. Here is the code example:
$query = "LastModifiedTimeForRetention<2021-01-01"
$apiUrl = "https://graph.microsoft.com/beta/search/query"
$body = @"
{
  "requests": [
    {
      "entityTypes": [
        "driveItem"
      ],
      "query": {
        "queryString": "$query"
      }
    }
  ]
}
"@

$res = Invoke-RestMethod -Headers $Headers -Uri $apiUrl -Body $Body -Method Post -ContentType 'application/json'
$res.value[0].searchTerms
$res.value[0].hitsContainers[0].hits
(*) Retention policy
If an organization is mature enough – it has data lifecycle policies established. If so – these polices must be applied to information stored in Microsoft 365 via retention policies. Retention policies are configured under Compliance center, but in particular applied to documents stored in SharePoint and OneDrive. Policies might dictate to retain documents or delete documents. Let say your organization is implementing retention policy that is configured to delete documents if 5 years passed after the file was last modified. That literally means all your files modified more than 5 years ago will be deleted and you will not even notice it. So – what if you want to know – which documents in your OneDrive or SharePoint site are older than 5 years?
Note: if your content was migrated from previous SharePoint versions (e.g. your old SharePoint on-prem farm) using migration tools – it’s last modified date is most likely was preserved (for instance, if your 5-years old doc was migrated 1 month ago – it last modified date would be 5 years ago). So if you are going to migrate your existing on-prem SharePoint to Microsoft 365 site and there are retention policies implemented in m365 – your content might be deleted right after migration.
Video tutorial
How to fetch all SharePoint documents older than some amount of time:


